

The term Dockerize refers to the process of packaging an application and its dependencies into containers using Docker. Docker is an open-source platform that helps developers automate the deployment of applications into lightweight and portable containers that contain everything needed to run the application, including the source code, libraries, and system tools. In this tutorial, we will learn How to Dockerize Spring Boot application with MySQL database.
Steps to Dockerize Spring Boot application with MySQL
For this tutorial on Dockerizing the Spring Boot application with MySQL, we will be using the employee-services application.
Step 1- Create MySQL docker image
First, we need to pull the latest MySQL Docker image from Docker Hub to our local system. We can use any terminal to perform this operation.
docker pull mysql:latestThe above command downloads the latest image of MySQL from Docker Hub.

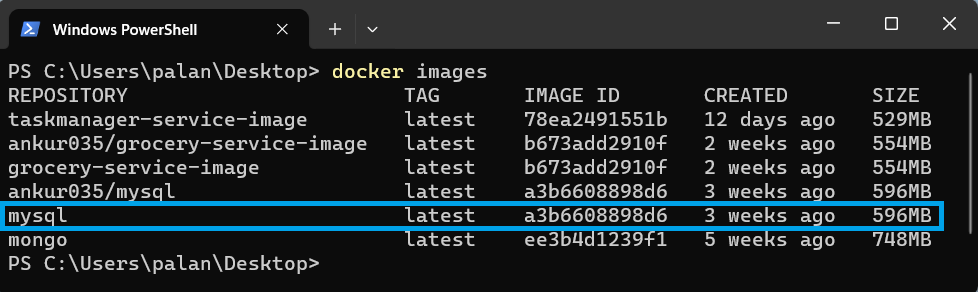
We can check the Docker images with the help of the following commands:
docker imagesIt will give all the Docker images available in our system.
Step 2- Create Docker network
In this step, we will create a Docker network that helps communicate the Spring Boot application with the MySQL database. It acts as a bridge between the two services.
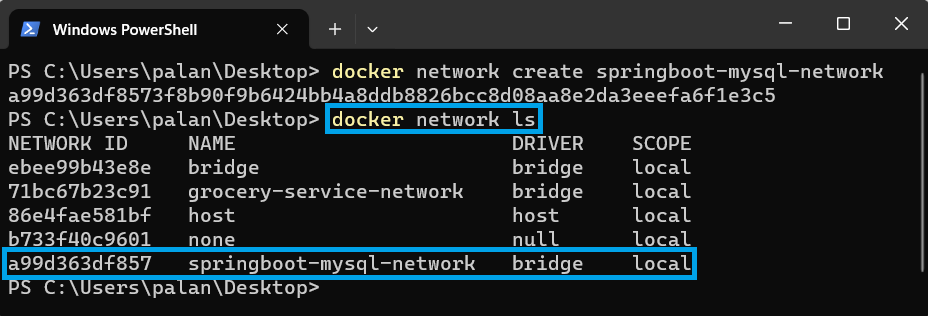
docker network create springboot-mysql-networkAs we are using the create option with docker network, this will create a network with the name springboot-mysql-network.

We can verify the docker network with the help of following commands:
docker network lsThe above command will list out all the docker networks available in our local system.
Step 3- Run MySQL container in docker network
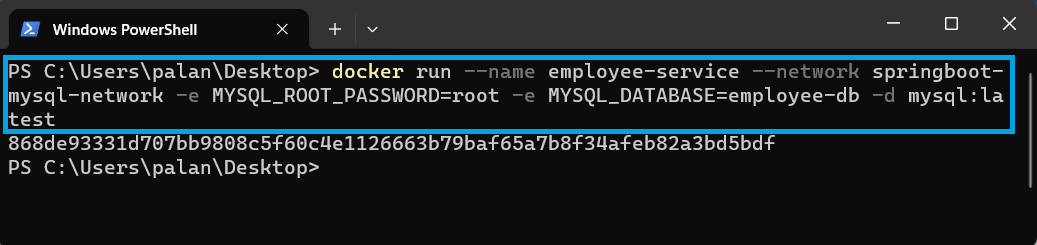
Now, we need to create a MySQL container, connect it to the Docker network, and run this container.
docker run --name employee-service --network springboot-mysql-network -e MYSQL_ROOT_PASSWORD=root -e MYSQL_DATABASE=employee-db -d mysql:latestLet’s understand the above command in detail:
- docker run
- It is used to run the docker container
- –name mysql-database
- This command set the container name to “employee-service”.
- –network springboot-mysql-network
- Connect the employee-service container to the docker network named “springboot-mysql-network”
- -e MYSQL_ROOT_PASSWORD=root
- It sets an environment variable in the container and configure the MySQL root user’s password to “root.”
- -e MYSQL_DATABASE=employee-db
- This sets an environment variable in the container, creating a MySQL database named “employee-db” when the container starts.
- -d
- Run the container in the background. i.e., detached mode.
- mysql:latest
- Use the official MySQL Docker image with the “latest” tag.
We can verify our container is started and running using the following commands:
docker psThis command will show all the running containers.

Step 4- Configure application.properties file
We use the following configuration to configure our application.properties file. We need to update our Datasource URL; instead of localhost, we are giving the MySQL container name that we have created above. i.e., employee-service.
#db config
spring.datasource.url=jdbc:mysql://employee-service:3306/employee-db
spring.datasource.username=root
spring.datasource.password=root
As we can see above, we have used the database name that we have configured in our employee-service container and the same password that we have used in our container database.
Step 5- Create Docker file
In this step, we will create a Dockerfile in our application’s root directory and add the following set of instructions that are used to build the Docker container image.
FROM openjdk:21
EXPOSE 9090
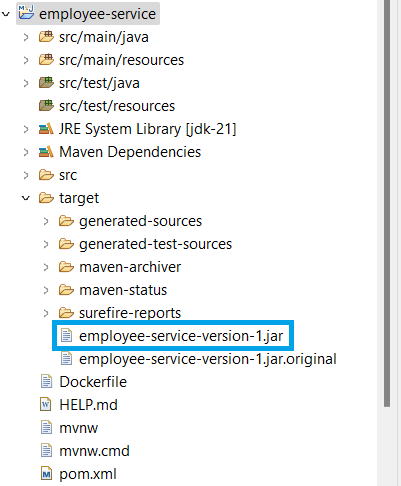
ADD target/employee-service-version-1.jar employee-service-version-1.jar
ENTRYPOINT ["java", "-jar", "/employee-service-version-1.jar"]Step 6- Build Spring Boot Jar
Moving further, we need to build the jar of our Spring Boot application. But, before that, make sure to add the jar or the final name of the application to the pom.xml file. Here, we are using the final name as employee-service-version-1.
mvn installThe above command will create the JAR of the application.
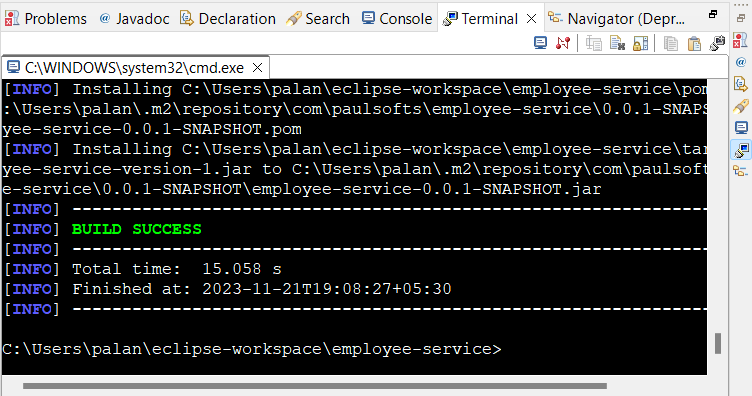
After the build is successful, we can verify that the JAR gets created in the application’s target directory. Also, if the build is failing due to testcases, please remove or skip the testcase.
Step 7- Spring Boot docker image
We are required to build the Spring Boot docker image. In order to build the docker image we are going to use the following command:
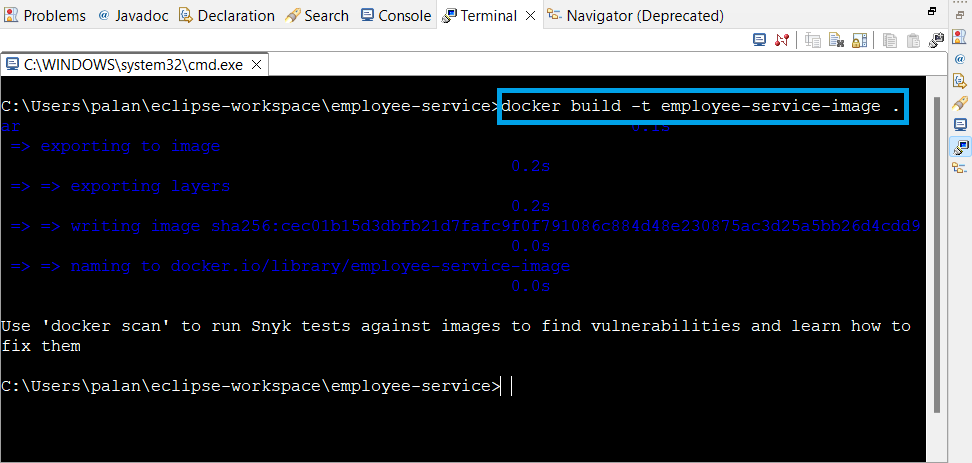
docker build -t employee-service-image .Note: The dot(.) at the end of the above command tells Docker to look for Docker images in the current directory.
Above command will build the docker image of our Spring boot application and name it as employee-service-image.
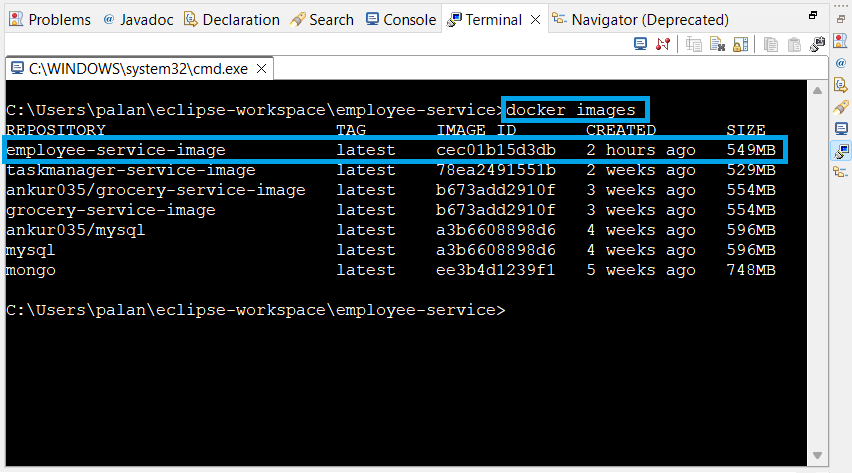
We can verify the Docker image using the following command:
docker imagesIt will list down all the docker images present locally.
Step 8- Start Spring Boot container on Network
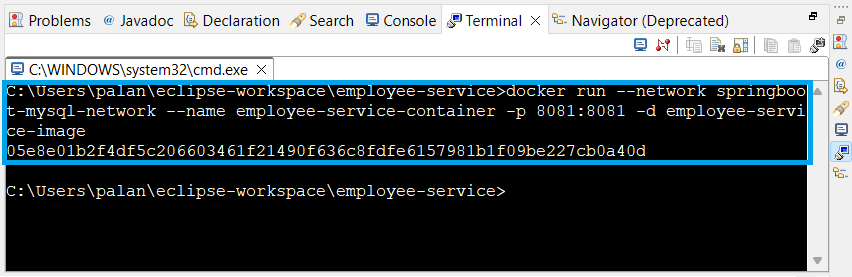
In this step, we need to start the Spring Boot container on the same network that we have created above. In this way, we have both our Spring Boot and MySQL containers running on the same network, and we can request that our application use the MySQL database to perform our operations.
docker run --network springboot-mysql-network --name employee-service-container -p 8081:8081 -d employee-service-imageIt will create a Spring Boot container, which will be running on the Docker network created in the above steps.
Step 9- Testing
Logs
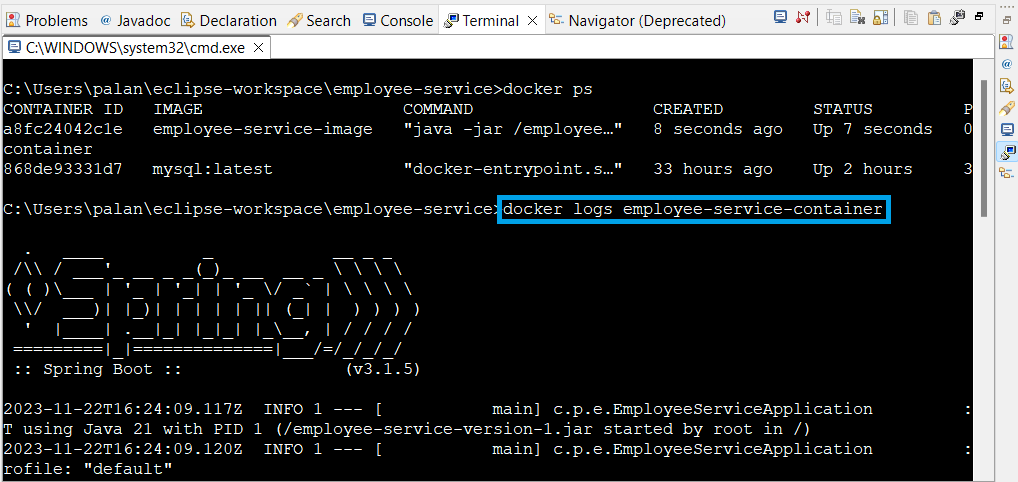
Now, we have successfully dockerized our Spring Boot application. We can check the logs with the help of following commands:
docker logs <container-id or container-name>Here, we will be using docker logs employee-service-container to check the application logs running into the docker container.
Requesting application using endpoints
We will test our application’s APIs using the Postman.
Create Request
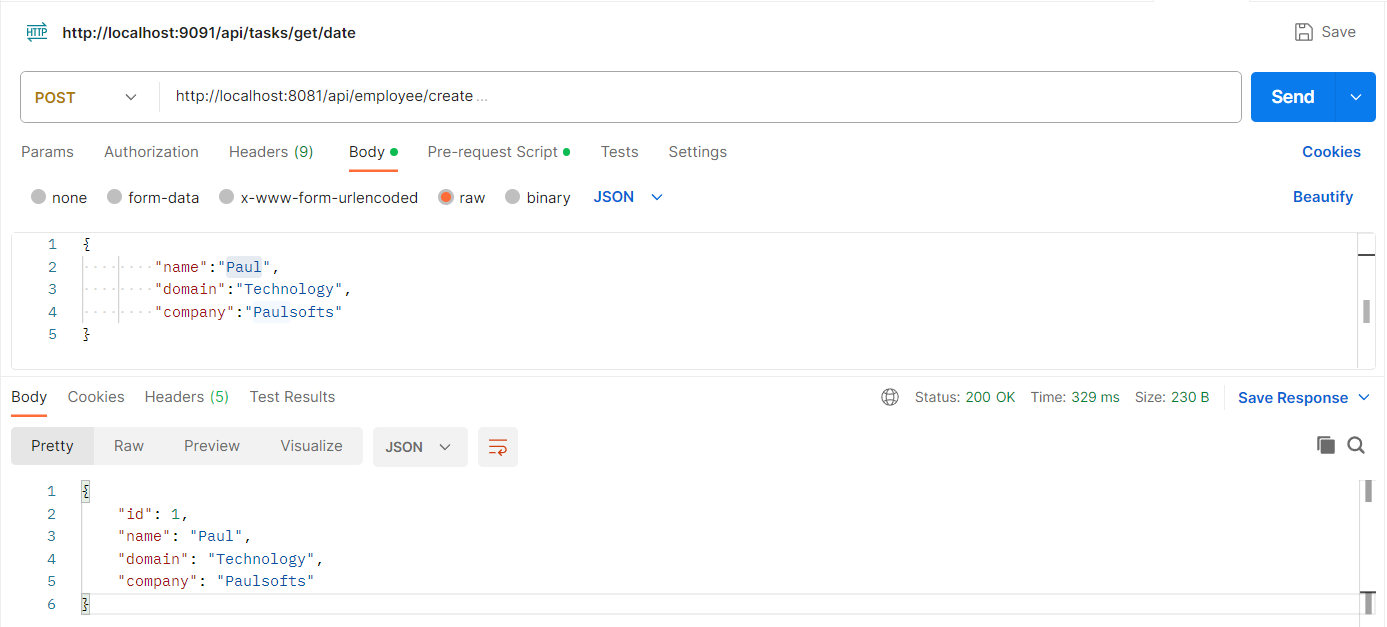
Get Request

Verify Database
We can also verify the database for the records created above using following commands:
docker exec -it <container-id> bash
mysql -u<user_name> -p<password>
Using the above commands, we will enter the MySQL database of the Docker container.

We use the basic SQL commands to view the employee which we have created above with the help of dockerized Spring Boot application.
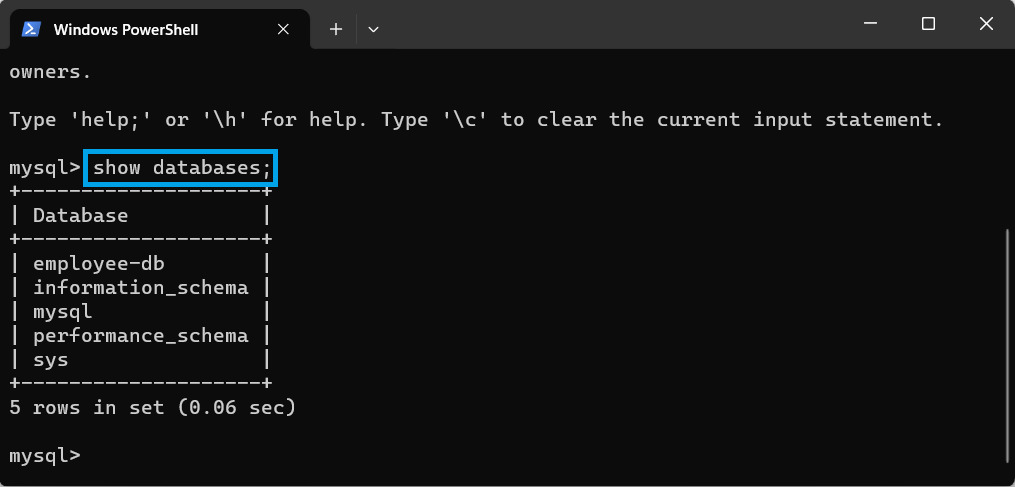
We can see our employee-db has been successfully created, which we have used in our application. properties file.
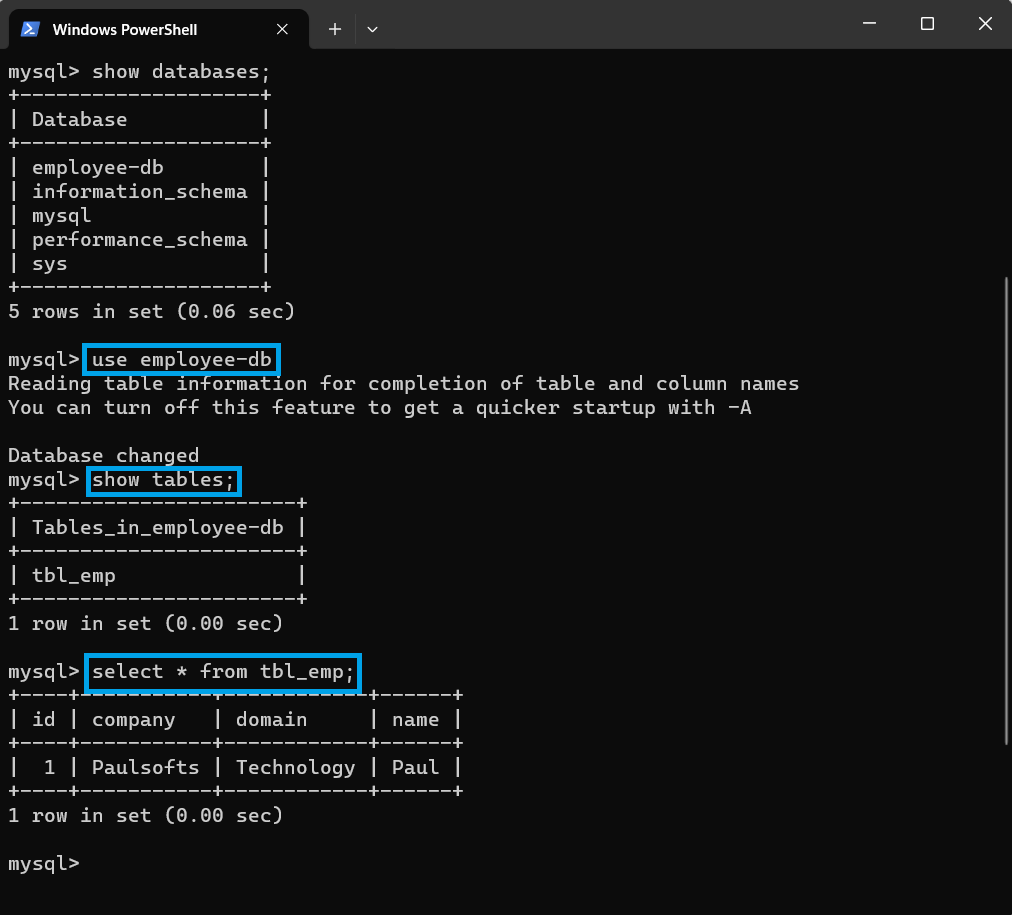
Above, we can see that our records have been successfully created.