

Spring Batch is an open-source framework and one of the core modules of Spring Framework. It is used to create a robust batch processing application that provides error handling, recovery mechanisms, easy scalability, and parallel processing of large volumes of data in Java applications. In this tutorial, we are going to use a Spring Batch 5.0 example to understand batch processing between a SQL and a NoSQL database.
Batch Processing
Batch processing involves executing repetitive tasks, such as data processing, file reading and writing, data synchronization etc. in large volumes or at specific intervals. In batch processing we processes the data in large groups called batches instead of single data elements. We process large volumes of data with minimal human interaction. We will learn about batch processing using the Spring Batch 5 example.
When to use Batch Processing
Spring Batch is used in scenarios that involve large-scale data processing, data migrations, and scheduled batch jobs in enterprise applications. The best use case for batch processing is when we need to transfer large volumes of data from source to destination.
Spring Batch Components
Following are the core components of Spring Batch that are used in the processing of huge volumes of data:
1. Job Launcher
The job launcher is an interface that is used to initiate a spring batch job. It acts as the entry point for initiating any spring batch job. Job launcher has a run method which triggers the Job component.
2. Spring batch Job
A job can be defined as the work or task to be executed with a spring batch. It can involve one or more steps to be executed in a specific order.
3. JobRepository
The JobRepository helps us maintain the status of a job, whether it succeeds or fails. For example, if we are running a spring batch job and an error occurs, how does Spring know that error has occurred or that job needs to be re-run? For this, we need the state of the job and other configurations to be setup.
Note: State management is an important aspect while processing large volumes of data, and this is achieved using JobRepository in Spring batch processing.
4. Step
A step is a single processing unit of a spring batch job. Steps involve reading data, processing the data, and writing data. The steps are configured to retry on failure and control the transaction boundaries.
5. ItemReader
ItemReader is responsible for reading data from various sources, such as databases, files, or web services.
6. ItemProcessor
ItemProcessor is used to process the data read by the item reader. For example, if we want to perform any operation in between reading and writing, it is done with the help of the item processor.
7. ItemWriter
ItemWriter is used to write the processed data to the target destination, such as a database or files.
Note: A single Job can have multiple steps, and a single step can have multiple item readers, item processors, or item writers.
Spring Batch Architecture

Spring Batch follows a structured process for batch data processing. When we use the run() method of the JobLauncher, it initiates job execution. This involves creating a new job instance through the create() method of the JobRepository. The job’s execute() method plans the execution of various steps. Each step’s execute() method manages the specific processing phase. Inside a step, the ItemReader.read() method fetches data, which is then passed to the ItemProcessor.process() method for any required transformation or business logic. Finally, the processed data is sent to the ItemWriter.write() method to be stored in a designated destination. This structured flow ensures efficient and reliable processing of large volumes of data in a batch-oriented manner.
Spring batch 5 example: Read data from MySQL and write to MongoDB
In this example, we will implement batch processing in our Spring Boot application using Spring Batch. We achieve batch processing for reading Employee data from the MySQL database and writing it to the MongoDB database. For ease of understanding, we will be using terms primary for MySQL configurations and secondary for MongoDB configurations.
Step to implement batch processing in Spring Boot
Step 1- Create a Spring Boot Project
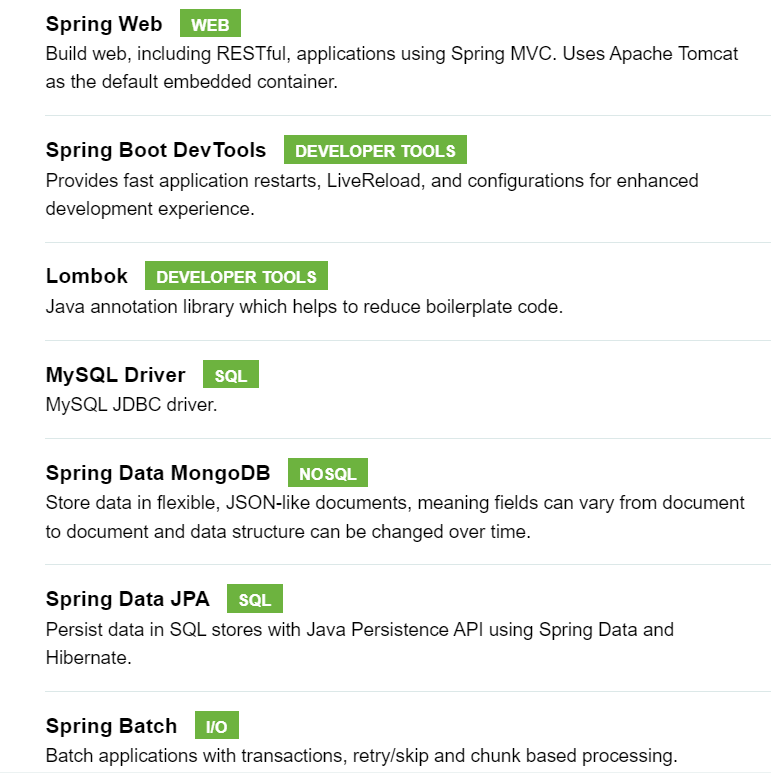
To create a new project in Spring Boot, please refer to How to Create a Spring Boot Project Note that you must select Maven as the project type. Make sure to add the following dependencies:
Step 2- Adding Database Configurations
We need to add the database configuration for MySQL and MongoDB to our application.properties file. We will configure two different databases, so we will be using primary for MySQL and secondary for Mongo configurations.
#server port
server.port=8081

#MySQL Configuration
spring.primary.jdbc-url=jdbc:mysql://localhost:3306/employee_db
spring.primary.username=root
spring.primary.password=root
spring.primary.driver-class-name=com.mysql.cj.jdbc.Driver

#MongoDB Configuration
mongodb.secondary.host=localhost
mongodb.secondary.port=27017
mongodb.secondary.database=employee_db


#Hibernate Dialect Configuration
spring.jpa.database=default
spring.jpa.properties.hibernate.dialect=org.hibernate.dialect.MySQLDialect
spring.jpa.show-sql=true
spring.jpa.hibernate.ddl-auto=update
Step 3- Create Entity Class
In order to read employee data from a MySQL database, we need to create an Employee entity.
package com.paulsofts.springbatch.primary;

import jakarta.persistence.Entity;
import jakarta.persistence.GeneratedValue;
import jakarta.persistence.GenerationType;
import jakarta.persistence.Id;
import jakarta.persistence.Table;
import lombok.Data;

@Entity
@Data
@Table(name="employee_info")
public class Employee {

	@Id
	@GeneratedValue(strategy = GenerationType.AUTO)
	private int emp_id;
	private String emp_name;
	private double emp_salary;
	private String emp_role;

}
Step 4- Create Repository Class
To read employee data from MySQL, we use JpaRepository. For this, we will create EmployeeRepository interface and implement JpaRepository<T, ID>.
package com.paulsofts.springbatch.primary;

import org.springframework.data.jpa.repository.JpaRepository;
import org.springframework.stereotype.Repository;

@Repository
public interface EmployeeRepository extends JpaRepository<Employee, Integer>  {

}
Step 5- Create MySQL Configuration Class
To read data from MySQL, we create a configuration class for the MySQL database. For this, we will create PrimaryDbConfig class and add the configurations for the primary database i.e. MySQL.
package com.paulsofts.springbatch.primary;

import javax.sql.DataSource;

import org.springframework.beans.factory.annotation.Qualifier;
import org.springframework.boot.context.properties.ConfigurationProperties;
import org.springframework.boot.jdbc.DataSourceBuilder;
import org.springframework.boot.orm.jpa.EntityManagerFactoryBuilder;
import org.springframework.context.annotation.Bean;
import org.springframework.context.annotation.Configuration;
import org.springframework.context.annotation.Primary;
import org.springframework.data.jpa.repository.config.EnableJpaRepositories;
import org.springframework.orm.jpa.JpaTransactionManager;
import org.springframework.orm.jpa.LocalContainerEntityManagerFactoryBean;
import org.springframework.transaction.PlatformTransactionManager;
import org.springframework.transaction.annotation.EnableTransactionManagement;

import jakarta.persistence.EntityManagerFactory;


@Configuration
@EnableTransactionManagement
@EnableJpaRepositories(
  entityManagerFactoryRef = "primaryEntityManagerFactory",
  transactionManagerRef = "primaryTransactionManager",
  basePackages = { "com.paulsofts.springbatch.primary" }
)
public class PrimaryDbConfig {

	@Bean(name="primaryDataSource")
	@ConfigurationProperties(prefix="spring.primary")
	@Primary
	public DataSource primaryDataSource() {
	    return DataSourceBuilder.create().build();
	}

	@Bean(name = "primaryEntityManagerFactory")
	@Primary
	public LocalContainerEntityManagerFactoryBean primaryEntityManagerFactory(EntityManagerFactoryBuilder builder,
			@Qualifier("primaryDataSource") DataSource primaryDataSource) {
		return builder
				.dataSource(primaryDataSource)
				.packages("com.paulsofts.springbatch.primary")
				.build();
	}

	@Bean(name = "primaryTransactionManager")
	public PlatformTransactionManager primaryTransactionManager(
			@Qualifier("primaryEntityManagerFactory") EntityManagerFactory primaryEntityManagerFactory) {
		return new JpaTransactionManager(primaryEntityManagerFactory);
	}
}
Step 6- Create Entity class
Once we have read the data from MySQL, we need to write it to MongoDB. For this, we need another entity class that will be mapped to MongoRepository. For our example, we are reading Employee data and writing it to MongoDB as a developer, so we will create a Developer class.
package com.paulsofts.springbatch.secondary;

import org.springframework.data.mongodb.core.mapping.Document;

import lombok.Data;

@Document(collection="employee_info")
@Data
public class Developer {

	private int emp_id;
	private String emp_name;
	private double emp_salary;
	private String emp_role;

}
Step 7- Create Mongo Repository
In order to write data to MongoDB, we will be using MongoRepository. For this, we create a DeveloperRepository interface and implement MongoRepository<T, ID>.
package com.paulsofts.springbatch.secondary;

import org.springframework.data.mongodb.repository.MongoRepository;
import org.springframework.stereotype.Repository;

@Repository
public interface DeveloperRepository extends MongoRepository<Developer, Integer> {

}
Step 8- Create MongoDB Configuration Class
To write data to MongoDB, we create a configuration class for MongoDB. For this, we will create SecondaryDbConfig class and add the configurations for the secondary database i.e. MongoDB.
package com.paulsofts.springbatch.secondary;

import java.util.Collections;

import org.springframework.beans.factory.annotation.Qualifier;
import org.springframework.boot.autoconfigure.mongo.MongoProperties;
import org.springframework.boot.context.properties.ConfigurationProperties;
import org.springframework.boot.context.properties.EnableConfigurationProperties;
import org.springframework.context.annotation.Bean;
import org.springframework.context.annotation.Configuration;
import org.springframework.context.annotation.Primary;
import org.springframework.data.mongodb.MongoDatabaseFactory;
import org.springframework.data.mongodb.core.MongoTemplate;
import org.springframework.data.mongodb.core.SimpleMongoClientDatabaseFactory;
import org.springframework.data.mongodb.repository.config.EnableMongoRepositories;
import org.springframework.transaction.annotation.EnableTransactionManagement;

import com.mongodb.MongoClientSettings;
import com.mongodb.ServerAddress;
import com.mongodb.client.MongoClient;
import com.mongodb.client.MongoClients;

@Configuration
@EnableMongoRepositories(
		basePackages = {"com.paulsofts.springbatch.secondary"},
		mongoTemplateRef = "secondaryTemplate"
		)
@EnableConfigurationProperties
@EnableTransactionManagement
public class SecondaryDbConfig {

	@Bean(name = "secondaryProperties")
    @ConfigurationProperties(prefix = "mongodb.secondary")
	@Primary
    public MongoProperties secondaryProperties() {
        return new MongoProperties();
    }

    @Bean(name = "secondaryClient")
    public MongoClient mongoClient(@Qualifier("secondaryProperties")MongoProperties mongoProperties) {
        return MongoClients.create(MongoClientSettings.builder()
          .applyToClusterSettings(builder -> builder
            .hosts(Collections.singletonList(new ServerAddress(mongoProperties.getHost(), mongoProperties.getPort()))))
          .build());
    }

    @Bean(name = "secondaryDbFactory")
    public MongoDatabaseFactory mongoDatabaseFactory(
      @Qualifier("secondaryClient") MongoClient mongoClient,
      @Qualifier("secondaryProperties") MongoProperties mongoProperties) {
        return new SimpleMongoClientDatabaseFactory(mongoClient, mongoProperties.getDatabase());
    }

    @Bean(name = "secondaryTemplate")
    public MongoTemplate mongoTemplate(@Qualifier("secondaryDbFactory") MongoDatabaseFactory mongoDatabaseFactory) {
        return new MongoTemplate(mongoDatabaseFactory);
    }
}
Step 9- Create Reader Class
Now, we need to create a Reader class that will read data from the MySQL database. For this, we are creating a Reader class that extends JdbcCursorItemReader<T>, which further implements ItemReader<T> and helps us read data from MySQL databases using SQL queries and store it in a ResultSet<T>. We use this result set to populate our Employee object.
package com.paulsofts.springbatch.config;

import java.sql.ResultSet;
import java.sql.SQLException;

import javax.sql.DataSource;

import org.springframework.batch.item.ItemReader;
import org.springframework.batch.item.database.JdbcCursorItemReader;
import org.springframework.beans.factory.annotation.Autowired;
import org.springframework.jdbc.core.RowMapper;
import org.springframework.stereotype.Component;

import com.paulsofts.springbatch.primary.Employee;

@Component
public class Reader extends JdbcCursorItemReader<Employee> implements ItemReader<Employee> {

	public Reader(@Autowired DataSource primaryDataSource) {
		setDataSource(primaryDataSource);
		setSql("SELECT * FROM employee_db.employee_info");
		setFetchSize(100);
		setRowMapper(new EmployeeRowMapper());
	}

	public class EmployeeRowMapper implements RowMapper<Employee> {
		@Override
		public Employee mapRow(ResultSet rs, int rowNum) throws SQLException {
			//create Employee object
			Employee emp  = new Employee();
			//reading data from ResultSet and write to Employee object
			emp.setEmp_id(rs.getInt("emp_id"));
			emp.setEmp_name(rs.getString("emp_name"));
			emp.setEmp_salary(rs.getDouble("emp_salary"));
			emp.setEmp_role(rs.getString("emp_role"));

			return emp;
		}
	}
}
Step 10- Create a Processor Class
In this step, we create a Processor class, implement ItemProcessor<T>, and override its process() method to process the Employee object and set it to the Developer object.
package com.paulsofts.springbatch.config;

import org.springframework.batch.item.ItemProcessor;
import org.springframework.stereotype.Component;

import com.paulsofts.springbatch.primary.Employee;
import com.paulsofts.springbatch.secondary.Developer;

@Component
public class Processor implements ItemProcessor<Employee, Developer> {

	@Override
	public Developer process(Employee item) throws Exception {

		Developer dev = new Developer();

		dev.setEmp_id(item.getEmp_id());
		dev.setEmp_name(item.getEmp_name());
		dev.setEmp_salary(item.getEmp_salary());
		dev.setEmp_role(item.getEmp_role());

		return dev;
	}

}
Step 11- Create Writer Class
After we have processed our data according to our requirements, we can write it to files or other databases. Here, we write the processed data to MongoDB. For this, we create a Writer class, implement the ItemWriter<T> interface, and override its write() method.
package com.paulsofts.springbatch.config;

import org.springframework.batch.item.Chunk;
import org.springframework.batch.item.ItemWriter;
import org.springframework.beans.factory.annotation.Autowired;
import org.springframework.stereotype.Component;

import com.paulsofts.springbatch.secondary.Developer;
import com.paulsofts.springbatch.secondary.DeveloperRepository;

@Component
public class Writer implements ItemWriter<Developer>{

	@Autowired
	private DeveloperRepository developerRepository;

	@Override
	public void write(Chunk<? extends Developer> chunk) throws Exception {

		for (Developer dev : chunk) {
			System.out.println("Writer    : Writing data    : " + dev.getEmp_id()+" : "+dev.getEmp_name()+" : "+dev.getEmp_salary()
			+" : "+dev.getEmp_role());
			developerRepository.save(dev);
		}
	}
}
Step 12- Create BatchConfig Class
Now, we need to configure our job and step for batch processing. For this, we create a BatchConfig class and add bean definitions to configure batch jobs and batch steps. We are using JobBuilder, a class from Spring Batch that is used to build and configure job instances. Spring Batch JobBuilder is used to construct the job with a specified name (below, “myJob”), is linked to a JobRepository, and starts with defined steps inside the start method.
By default, Spring Batch is synchronous, so to make it asynchronous, we need to add AsyncTaskExecutor.
package com.paulsofts.springbatch.config;

import org.springframework.batch.core.Job;
import org.springframework.batch.core.Step;
import org.springframework.batch.core.job.builder.JobBuilder;
import org.springframework.batch.core.repository.JobRepository;
import org.springframework.batch.core.step.builder.StepBuilder;
import org.springframework.beans.factory.annotation.Autowired;
import org.springframework.context.annotation.Bean;
import org.springframework.context.annotation.Configuration;
import org.springframework.core.task.SimpleAsyncTaskExecutor;
import org.springframework.core.task.TaskExecutor;
import org.springframework.transaction.PlatformTransactionManager;

import com.paulsofts.springbatch.primary.Employee;
import com.paulsofts.springbatch.secondary.Developer;


@Configuration
public class BatchConfig{

	@Autowired
	private Reader reader;

	@Autowired
	private Processor processor;

	@Autowired
	private Writer writer;

    @Bean
	public Job job(JobRepository jobRepository, PlatformTransactionManager platformTransactionManager) {
		return new JobBuilder("myJob", jobRepository)
				.start(step(jobRepository, platformTransactionManager))
				.build();
	}

    @Bean
    public Step step(JobRepository jobRepository, PlatformTransactionManager platformTransactionManager) {
        return new StepBuilder("myStep", jobRepository)
            .<Employee, Developer>chunk(1, platformTransactionManager)
            .reader(reader)
            .processor(processor)
            .writer(writer)
            .taskExecutor(taskExecutor())
            .build();
    }

    public TaskExecutor taskExecutor() {
    	SimpleAsyncTaskExecutor simpleAsyncTaskExecutor = new SimpleAsyncTaskExecutor();
    	//two threads run concurrently for batch processing
    	simpleAsyncTaskExecutor.setConcurrencyLimit(2);
    	return simpleAsyncTaskExecutor;
    }
}
Step 13- Create Database
After we are done with the spring batch codebase, we will create our MySQL database in order to read data from it. For this example, we use only five different records. If you want to load huge volumes of records, please refer How to generate one million records in SQL.
-- Make sure to change the database according to your own requirements
-- @author Paulsofts
CREATE DATABASE employee_db;

CREATE TABLE employee_db.employee_info(
	emp_id INT(10) NOT NULL,
    emp_name VARCHAR(45),
    emp_salary DOUBLE,
    emp_role VARCHAR(20)
);

INSERT INTO employee_db.employee_info VALUES
(1, "Rahul", 50000.0, "Developer"),
(2, "Priya", 35000.0, "UI/UX"),
(3, "Pallavi", 75000.0, "TL"),
(4, "Ashutosh", 32000.50, "Tester"),
(5, "Shivam", 63200.75, "DevOps"),
(6, "Mohan", 100000.0, "Manager");
Step 14- Create Spring Batch Meta Tables
In this step, we will create the required spring batch meta tables. Make sure to change the database name according to your own requirements.
-- Spring batch processing requried tables
-- Change the database name from employee_db to your required database name
-- @author: paulsofts
CREATE TABLE employee_db.BATCH_JOB_INSTANCE  (
	JOB_INSTANCE_ID BIGINT  NOT NULL PRIMARY KEY ,
	VERSION BIGINT ,
	JOB_NAME VARCHAR(100) NOT NULL,
	JOB_KEY VARCHAR(32) NOT NULL,
	constraint JOB_INST_UN unique (JOB_NAME, JOB_KEY)
) ENGINE=InnoDB;

CREATE TABLE employee_db.BATCH_JOB_EXECUTION  (
	JOB_EXECUTION_ID BIGINT  NOT NULL PRIMARY KEY ,
	VERSION BIGINT  ,
	JOB_INSTANCE_ID BIGINT NOT NULL,
	CREATE_TIME DATETIME(6) NOT NULL,
	START_TIME DATETIME(6) DEFAULT NULL ,
	END_TIME DATETIME(6) DEFAULT NULL ,
	STATUS VARCHAR(10) ,
	EXIT_CODE VARCHAR(2500) ,
	EXIT_MESSAGE VARCHAR(2500) ,
	LAST_UPDATED DATETIME(6),
	constraint JOB_INST_EXEC_FK foreign key (JOB_INSTANCE_ID)
	references BATCH_JOB_INSTANCE(JOB_INSTANCE_ID)
) ENGINE=InnoDB;

CREATE TABLE employee_db.BATCH_JOB_EXECUTION_PARAMS  (
	JOB_EXECUTION_ID BIGINT NOT NULL ,
	PARAMETER_NAME VARCHAR(100) NOT NULL ,
	PARAMETER_TYPE VARCHAR(100) NOT NULL ,
	PARAMETER_VALUE VARCHAR(2500) ,
	IDENTIFYING CHAR(1) NOT NULL ,
	constraint JOB_EXEC_PARAMS_FK foreign key (JOB_EXECUTION_ID)
	references BATCH_JOB_EXECUTION(JOB_EXECUTION_ID)
) ENGINE=InnoDB;

CREATE TABLE employee_db.BATCH_STEP_EXECUTION  (
	STEP_EXECUTION_ID BIGINT  NOT NULL PRIMARY KEY ,
	VERSION BIGINT NOT NULL,
	STEP_NAME VARCHAR(100) NOT NULL,
	JOB_EXECUTION_ID BIGINT NOT NULL,
	CREATE_TIME DATETIME(6) NOT NULL,
	START_TIME DATETIME(6) DEFAULT NULL ,
	END_TIME DATETIME(6) DEFAULT NULL ,
	STATUS VARCHAR(10) ,
	COMMIT_COUNT BIGINT ,
	READ_COUNT BIGINT ,
	FILTER_COUNT BIGINT ,
	WRITE_COUNT BIGINT ,
	READ_SKIP_COUNT BIGINT ,
	WRITE_SKIP_COUNT BIGINT ,
	PROCESS_SKIP_COUNT BIGINT ,
	ROLLBACK_COUNT BIGINT ,
	EXIT_CODE VARCHAR(2500) ,
	EXIT_MESSAGE VARCHAR(2500) ,
	LAST_UPDATED DATETIME(6),
	constraint JOB_EXEC_STEP_FK foreign key (JOB_EXECUTION_ID)
	references BATCH_JOB_EXECUTION(JOB_EXECUTION_ID)
) ENGINE=InnoDB;

CREATE TABLE employee_db.BATCH_STEP_EXECUTION_CONTEXT  (
	STEP_EXECUTION_ID BIGINT NOT NULL PRIMARY KEY,
	SHORT_CONTEXT VARCHAR(2500) NOT NULL,
	SERIALIZED_CONTEXT TEXT ,
	constraint STEP_EXEC_CTX_FK foreign key (STEP_EXECUTION_ID)
	references BATCH_STEP_EXECUTION(STEP_EXECUTION_ID)
) ENGINE=InnoDB;

CREATE TABLE employee_db.BATCH_JOB_EXECUTION_CONTEXT  (
	JOB_EXECUTION_ID BIGINT NOT NULL PRIMARY KEY,
	SHORT_CONTEXT VARCHAR(2500) NOT NULL,
	SERIALIZED_CONTEXT TEXT ,
	constraint JOB_EXEC_CTX_FK foreign key (JOB_EXECUTION_ID)
	references BATCH_JOB_EXECUTION(JOB_EXECUTION_ID)
) ENGINE=InnoDB;

CREATE TABLE employee_db.BATCH_STEP_EXECUTION_SEQ (
	ID BIGINT NOT NULL,
	UNIQUE_KEY CHAR(1) NOT NULL,
	constraint UNIQUE_KEY_UN unique (UNIQUE_KEY)
) ENGINE=InnoDB;

INSERT INTO employee_db.BATCH_STEP_EXECUTION_SEQ (ID, UNIQUE_KEY) select * from (select 0 as ID, '0' as UNIQUE_KEY) as tmp where not exists(select * from employee_db.BATCH_STEP_EXECUTION_SEQ);

CREATE TABLE employee_db.BATCH_JOB_EXECUTION_SEQ (
	ID BIGINT NOT NULL,
	UNIQUE_KEY CHAR(1) NOT NULL,
	constraint UNIQUE_KEY_UN unique (UNIQUE_KEY)
) ENGINE=InnoDB;

INSERT INTO employee_db.BATCH_JOB_EXECUTION_SEQ (ID, UNIQUE_KEY) select * from (select 0 as ID, '0' as UNIQUE_KEY) as tmp where not exists(select * from employee_db.BATCH_JOB_EXECUTION_SEQ);

CREATE TABLE employee_db.BATCH_JOB_SEQ (
	ID BIGINT NOT NULL,
	UNIQUE_KEY CHAR(1) NOT NULL,
	constraint UNIQUE_KEY_UN unique (UNIQUE_KEY)
) ENGINE=InnoDB;

INSERT INTO employee_db.BATCH_JOB_SEQ (ID, UNIQUE_KEY) select * from (select 0 as ID, '0' as UNIQUE_KEY) as tmp where not exists(select * from employee_db.BATCH_JOB_SEQ);
Once we run the above MySQL script, the following tables will be created:

Step 15- Run Application
Now, we will test our application.

We can see, as we have run our application, the Spring batch reads data from MySQL and writes it to MongoDB.

getting issue that job Respository needs datasouce in mongo implementation
Can you please provide the complete error trace, or you can also email feedback@paulsofts.com
Make sure to configure pom.xml and Step-8 carefully.
actually am reading from excel and writing to mongodb. I am getting datasource issue for jobRepository.
Parameter 0 of method csvProcessingStep in com.demo.client.excel.ExcelUploadConfig required a bean named ‘dataSource’ that could not be found.
It seems like this is because of the Spring Batch meta tables (Step 14). One quick solution is to try to disable it. Add the following properties to your application.properties file.
spring.batch.initialize-schema=never
Also, if it doesn’t work, try adding the following import statement and the method inside your batch config class (where you have your job and step methods).
import javax.sql.DataSource;
@Override
public void setDataSource(DataSource dataSource){
super.setDataSource(null);
}
I am also doing the same and getting the same error for my stepBuilder bean
Parameter 0 of method stepBuilder in com.template.springbatch.batch.SpringBatchConfig required a bean named ‘dataSource’ that could not be found.
Tried:
1) I tried spring.batch.initialize-schema=never
2) for setting datasource as null. I am not extending any class for my springbatch.
So, what shall I do?
While creating a custom reader class, we are already setting the data source. We are not required to add it explicitly. The Spring container is not able to find the data source. Please try to check each step you have set correctly, especially for PlatformTransactionManager. For reference, we have attached the complete source code available on GitHub.
How to create spring batch meta tables in mongoDb ?
We need to specifically design the Mongo document classes and corresponding repository interfaces according to the metatable requirement in our project. Something as shown below,
Classes
import org.springframework.data.annotation.Id;

import org.springframework.data.mongodb.core.mapping.Document;

import java.util.Date;
@Document(collection = "batch_job_instance")
public class BatchJobInstance {
@Id
private String id;
private Long version;
private String jobName;
private String jobKey;
// getters and setters
}
@Document(collection = "batch_job_execution")
public class BatchJobExecution {
@Id
private String id;
private Long version;
private String jobInstanceId;
private Date createTime;
private Date startTime;
private Date endTime;
private String status;
private String exitCode;
private String exitMessage;
private Date lastUpdated;
// getters and setters
}
@Document(collection = "batch_step_execution")
public class BatchStepExecution {
@Id
private String id;
private Long version;
private String stepName;
private String jobExecutionId;
private Date createTime;
private Date startTime;
private Date endTime;
private String status;
private Long commitCount;
private Long readCount;
private Long filterCount;
private Long writeCount;
private Long readSkipCount;
private Long writeSkipCount;
private Long processSkipCount;
private Long rollbackCount;
private String exitCode;
private String exitMessage;
private Date lastUpdated;
// getters and setters
}
Repositories
import org.springframework.data.mongodb.repository.MongoRepository;
public interface BatchJobInstanceRepository extends MongoRepository {
}
public interface BatchJobExecutionRepository extends MongoRepository {
}
public interface BatchStepExecutionRepository extends MongoRepository {
}
Thanks for your response.
If possible , can you share with github link with those details with working code ?
I believe we are not required to create meatadata tables as we do in relational database tables. You just need to add the spring-batch-mongodb dependencies in order to play with metadata tables in Mongodb. Currently, I don’t have any such github repository; soon, I will try to upload one.
Thanks for your quick response.