Docker is a platform that is used for developing, shipping and running applications inside containers. The containers are lightweight and portable units that package the application and its dependencies, enabling them to run consistently across different environments (DEV, SIT, and PROD) as well as on different systems. In this tutorial, we will learn how to Dockerize Spring Boot application with MongoDB.
For this tutorial, we are going to use the TaskManger-Service application. To learn how to build this application, please refer to CRUD Operations: How to Integrate Spring Boot with MonogDB.
Spring Boot MongoDB Docker Example
Step 1- Create Docker Mongo Image
In this step, we will first pull the latest Mongo image from Docker Hub to our local system. After logging into Docker, we use the following command using the terminal to download the latest Mongo image:
docker pull mongo:latestThis will automatically download the latest Mongo docker image from the Docker Hub.

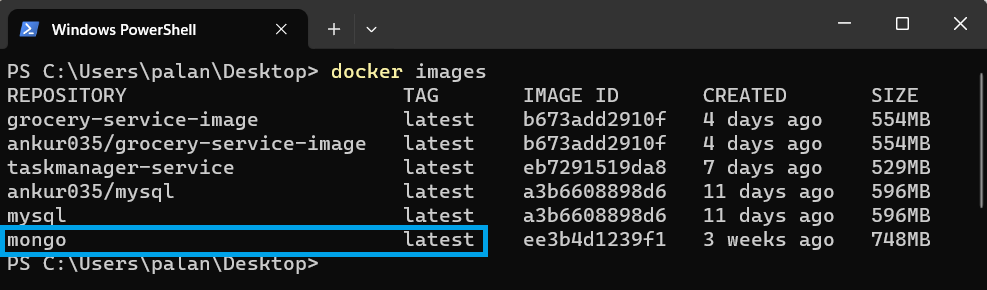
We can verify the Mongo image using the following command:
docker imagesThis command will show all the available Docker images.
Step 2- Run Docker Image
Now, we need to run Docker images locally. Once we run the Mongo Docker image, it will run the Mongo Database in the container itself.
docker run -d -p 27017:27017 --name taskmanager-service-container mongo:latest- docker run It will run a docker container.
- -d It represents detached mode, which means the container runs in the background without attaching the container console, and our terminal is free for other commands.
- –p 27017:27017 This is used to specify the host and container port numbers.
- –name The name tag is used to specify the name of the container.
- mongo:latest It is used to pass the image of Mongo.

Above, we can see that once the container is created, we can verify it with the help of the following command:
docker psStep 3- Add Configuration
In this step, we add the required configuration needed to Dockerize the Spring Boot application with MongoDB. In the application.properties file, for the host name, we add the container name that we have created above. i.e., taskmanager-service-container.
server.port=9090
spring.data.mongodb.host=taskmanager-service-container
spring.data.mongodb.port=27017
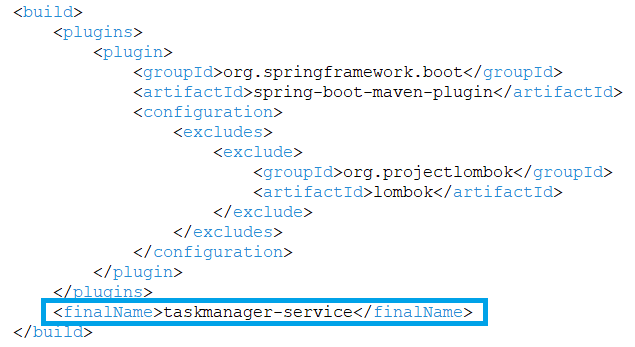
spring.data.mongodb.database=task_dbAlso, make sure to add jar name inside the pom.xml file. Here, we have used taskmanager-service as the jar name.
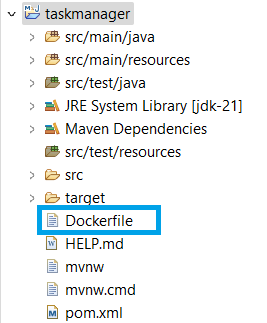
Step 4- Create Dockerfile
We need to add a Dockerfile to our spring boot project. For this, we will create a new file in our project root directory and name it Dockerfile. The Dockerfile is used to define the set of instructions for building a Docker container image.
We use the following set of instructions to build our Docker image:
FROM openjdk:21
EXPOSE 9090
ADD target/taskmanager-service.jar taskmanager-service.jar
ENTRYPOINT ["java", "-jar", "/taskmanager-service.jar"]
Let us understand each of the instructions in detail.
- FROM openjdk:21
- FROM instruction is used to specify the base image on which the Docker container will be built. It means our Docker container will have Java 21 installed as its runtime environment.
- EXPOSE 9090
- It informs Docker that the container will listen on port 9090. It is used only for documentation purposes; it will not publish the port. We can skip this, as we will need to specify the port using -p while running our container.
- ADD target/taskmanager-service.jar taskmanager-service.jar
- This instruction is used to a add jar file from the target directory of our machine to the root directory of the container.
- ENTRYPOINT [“java”, “-jar”, “/taskmanager-service.jar”]
- ENTRYPOINT specifies the command that should be executed when Docker starts. It runs the application using the java -jar command with /taskmanager-service.jar as argument.
Step 5- Build Spring Boot application jar
Now we need to build the jar file for our application. We have already specified the jar name and its location in our Dockerfile. To build the application, we use the following command in our terminal:
mvn installIn order to learn more in detail about creating a spring boot jar, please refer to How to package the Spring Boot application into a JAR.

After the build is completed we can have our application jar in target directory.

Step 6- Build Docker image of Spring boot JAR
After this, we are required to build the docker image of the Spring Boot JAR. We can move to our Spring Boot application directory and open terminal there or directly use Eclipse terminal to build the image. We are going to use the following command:
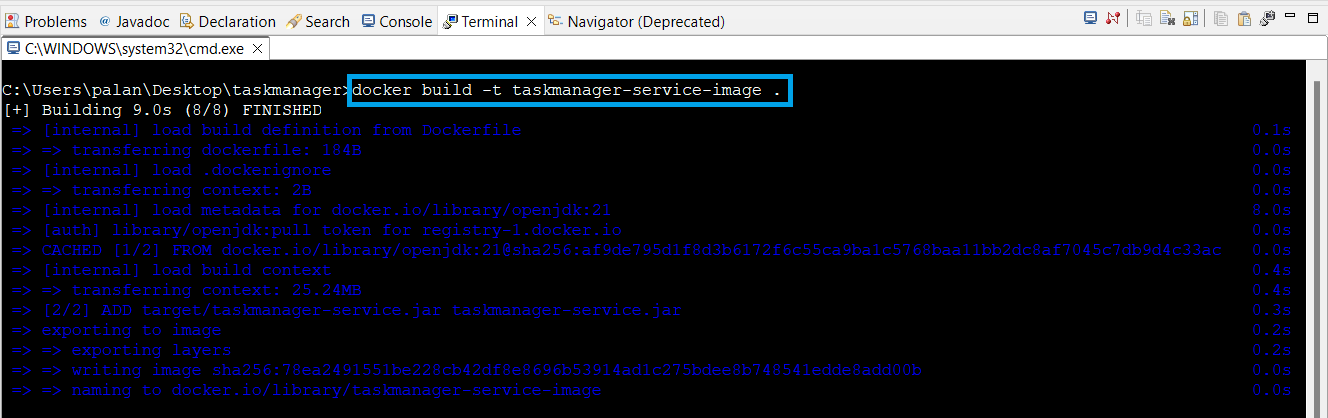
docker build -t taskmanager-service-image .Let us understand the command in detail.
- docker build It is used to build the Docker image based on the instructions provided in the Dockerfile.
- -t Specifies the name of the Docker image.
- taskmanager-service-image We have used it as the name of our Docker image.
- . The dot(.) at the end of the command tells the docker to look for Dockerfile in the current directory.
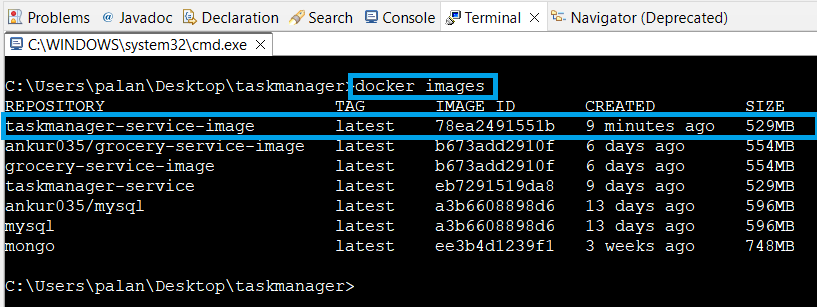
We can verify with the help of docker images command whether our image was created or not.
Step 7- Link Spring Boot and MongoDB docker images
Now, we have the Mongo image as well as the Spring Boot application image running in our system. Moving ahead, we are required to link these images and run our container. For this, we use the following command:
docker run -p 9090:9090 --name taskmanager-service-image --link taskmanager-service-container:mongo -d taskmanager-service-imageIn the above command, we are linking our MongoDB container (taskmanager-service-container) with the Spring Boot application image (taskmanager-service-image) with the help of the –link command and running container taskmanager-service-image which we have specified with the –name command.

Note: The command creates and runs a Docker container named "taskmanager-service-image" based on the image "taskmanager-service-image." It maps host port 9090 to container port 9090 and links the container to another container named "taskmanager-service-container" with the alias "mongo." The container runs in the background as a detached process. This setup allows the "taskmanager-service-image" container to communicate with the "taskmanager-service-container" container via the "mongo" alias.
Step 8- Testing
We have successfully dockerized the Spring boot application with Mongo. Now, we will test our application.
Check Logs
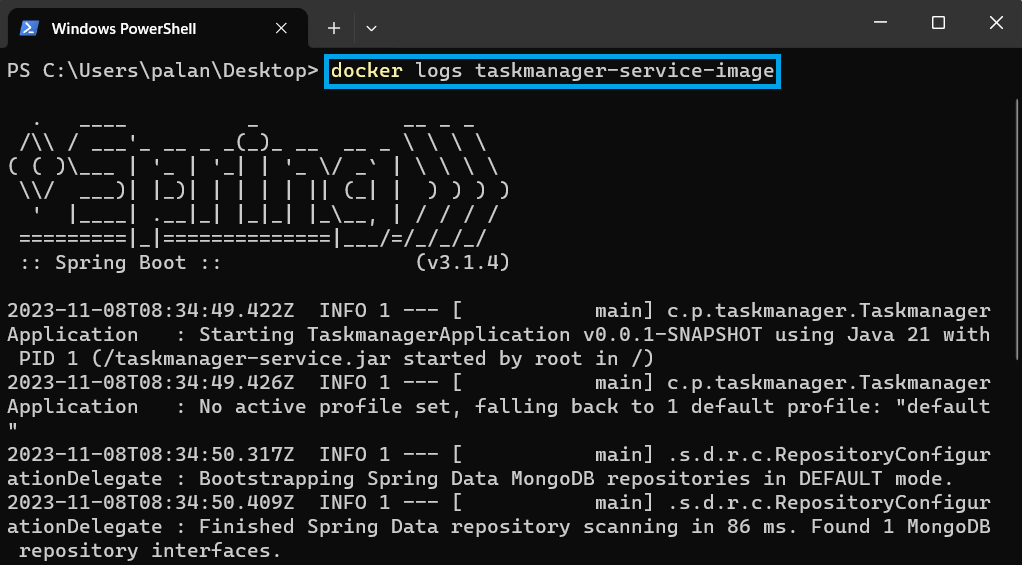
First, we check the application logs with the help of following command:
docker logs <container-name or container-id>We use docker logs taskmanager-service-image to check the logs of our application running on container taskmanager-service-image.
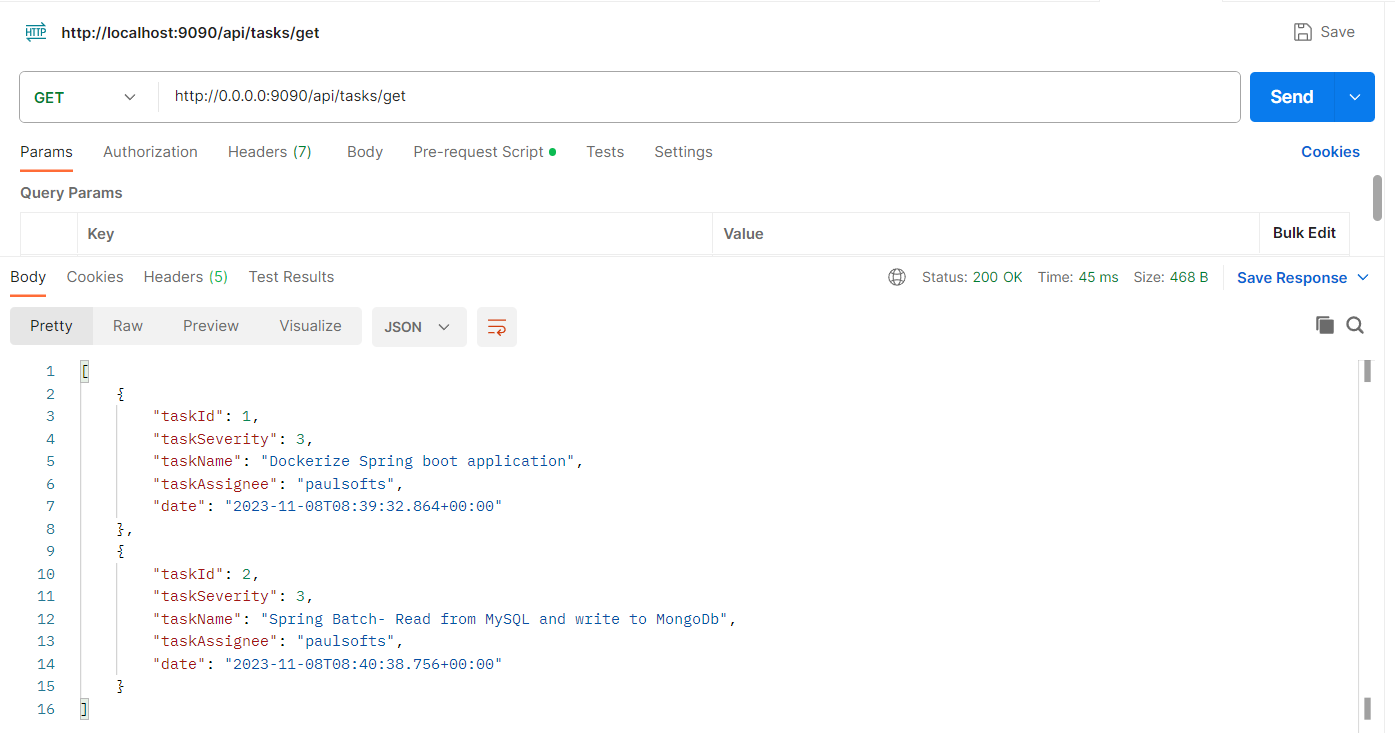
API Test
We use Postman to test our APIs.
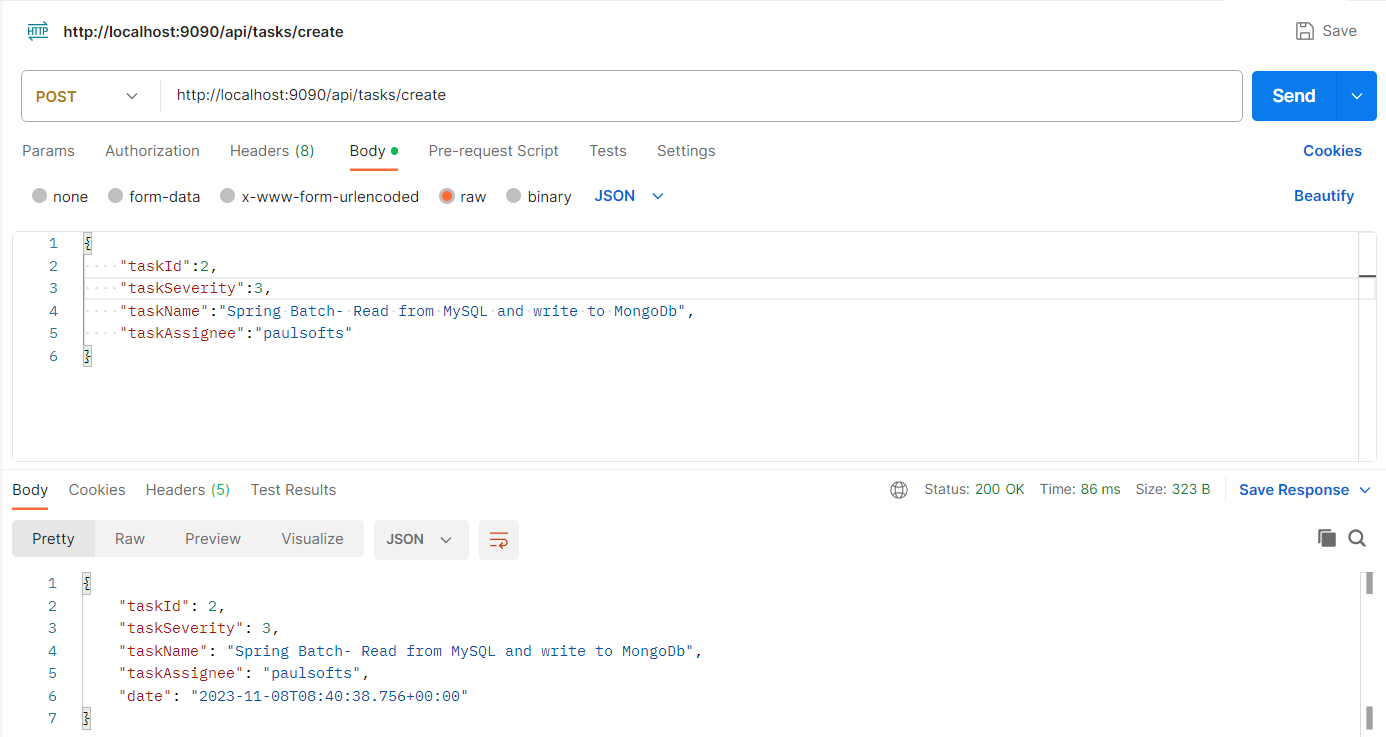
We can retrieve data from the MongoDB running in a Docker container. Below, we can see we are using 0.0.0.0 as the host IP, which is the IP address of our MongoDB Docker container.