

The integration of Jenkins with GitHub comes with the default plugins that come with the Jenkins installation, namely, the Git plugin and the GitHub plugin. These plugins provide the following features to Jenkins:
- Git Plugin
- It gives the ability to the Jenkins to pull code from the GitHub.
- GitHub Plugin
- It gives ability to the Jenkins to trigger the build whenever any GitHub commits occur.

Step to integrate Jenkins with GitHub for Continuous Integration
Step 1- Create a Spring Boot Project
First, we will create a simple spring boot project. To create a new project in Spring Boot, please refer to How to Create a Spring Boot Project?

Step 2- Codes for Continuous Integration
As we know, Jenkins is an open-source automation server that is used for build, test, and deployment. So, to check the build feature, we add logging statements. For this, go to the Spring Boot Main Class (here, JenkinsApplication) and add the following codes:
package com.paulsofts.jenkins;

import org.apache.logging.log4j.LogManager;
import org.apache.logging.log4j.Logger;
import org.springframework.boot.SpringApplication;
import org.springframework.boot.autoconfigure.SpringBootApplication;

import jakarta.annotation.PostConstruct;

@SpringBootApplication
public class JenkinsApplication {

	public static Logger LOGGER = LogManager.getLogger(JenkinsApplication.class);

	//this method will run before the JenkinsApplication starts
	//@PostConstruct is executed once the spring bean is initialized
	@PostConstruct
	public void init() {
		LOGGER.info("JenkinsApplication is Starting...");
		LOGGER.info("Jenkins - Introduction to Continuous Integration");
	}

	public static void main(String[] args) {
		LOGGER.info("JenkinsApplicaion is Running!!!");
		SpringApplication.run(JenkinsApplication.class, args);
	}

}
Similarly, in order to check the Jenkins test feature, we will add the logging statements. For this, go to Spring Boot Test Class (Here, JenkinsApplicationTests) and enter the following codes:
package com.paulsofts.jenkins;

import static org.junit.jupiter.api.Assertions.assertEquals;

import org.apache.logging.log4j.LogManager;
import org.apache.logging.log4j.Logger;
import org.junit.jupiter.api.Test;
import org.springframework.boot.test.context.SpringBootTest;

@SpringBootTest
class JenkinsApplicationTests {

	public static Logger LOGGER = LogManager.getLogger(JenkinsApplicationTests.class);

	@Test
	void contextLoads() {
		LOGGER.info("Jenkins executing Test Cases");
		assertEquals(true, true);
	}

}
Step 3- Jenkins Continuous Integration (Jenkins Job)
In this step, we will configure continuous integration for our application. We will be required to create a new Jenkins job and configure our source code repository with our Jenkins job so that every time any code changes in our source code repository, Jenkins will automatically start the build and test processes.
Note: Before moving further, we will push our code to GitHub. One can find the complete code on our GitHub repository.
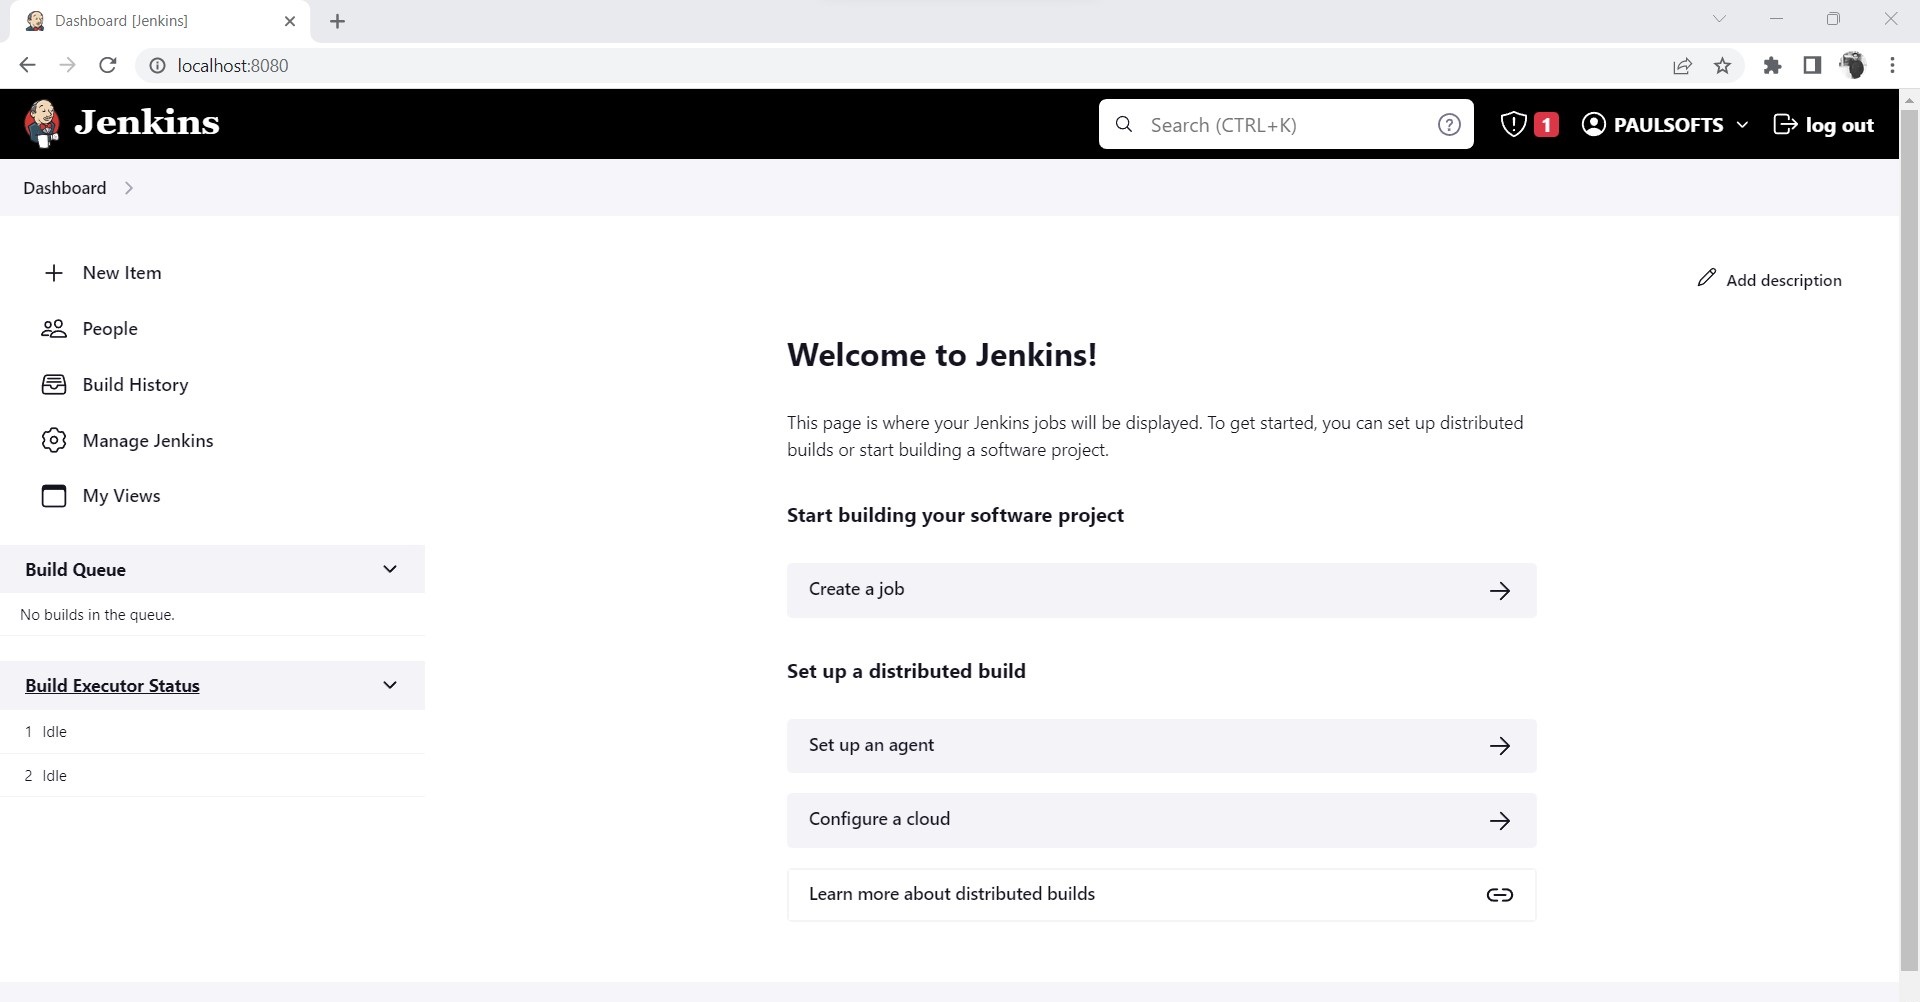
We use the Jenkins dashboard to create a new Jenkins job. Make sure that the Jenkins server is up and running. In the Jenkins dashboard, we click on Create a Job.
Once we click on Create a job, Jenkins will open a window for job items. We need to enter a name for our job, and we will click on “Project Type” as Freestyle Project.

After we click OK, we need to configure following steps for Jenkins continuous integration.
3.1 General
In this section, we can give a brief description of our project, tick-mark the GitHub project, and add the project URL. Click on “Advanced” and add Display Name.

3.2 Source Code Management
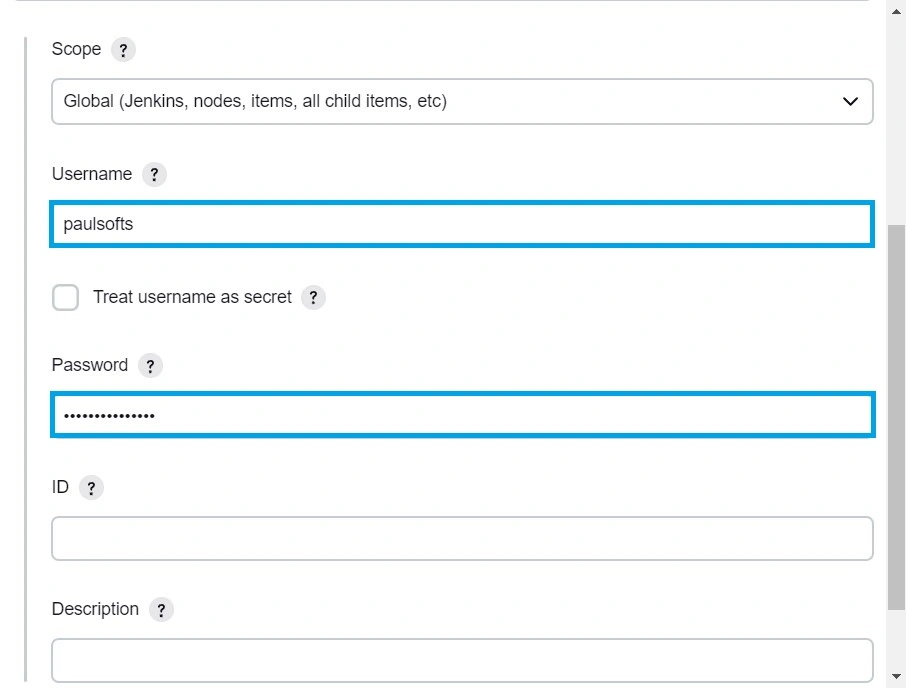
In source code management, we need to add our Source Code Repository URL. Here, we are using GitHub, so we add the GitHub Repository URL. We were also required to add the Jenkins credentials. For this, click > Drop-down Menu “Add” > Jenkins and add Jenkins credentials.

On clicking Jenkins, a new window will appear where we need to add Jenkins username and password.
After we have saved the Jenkins credentials, we can click on the drop-down menu “Credentials” and choose the saved Jenkins credentials.

3.3 Build Triggers
Build triggers are used for scheduling the build task. Jenkins will automatically trigger the build depending on the build constraints. Here, we are scheduling the build in such a way that Jenkins starts the build every minute as soon as any code changes occur.

3.4 Build Environment
In the build environment, we are not required to do anything, so we are skipping this step.
3.5 Build Steps
In the build steps, we need to set the build goals. With the help of the Add build step drop-down menu, we choose Invoke top-level Maven targets.
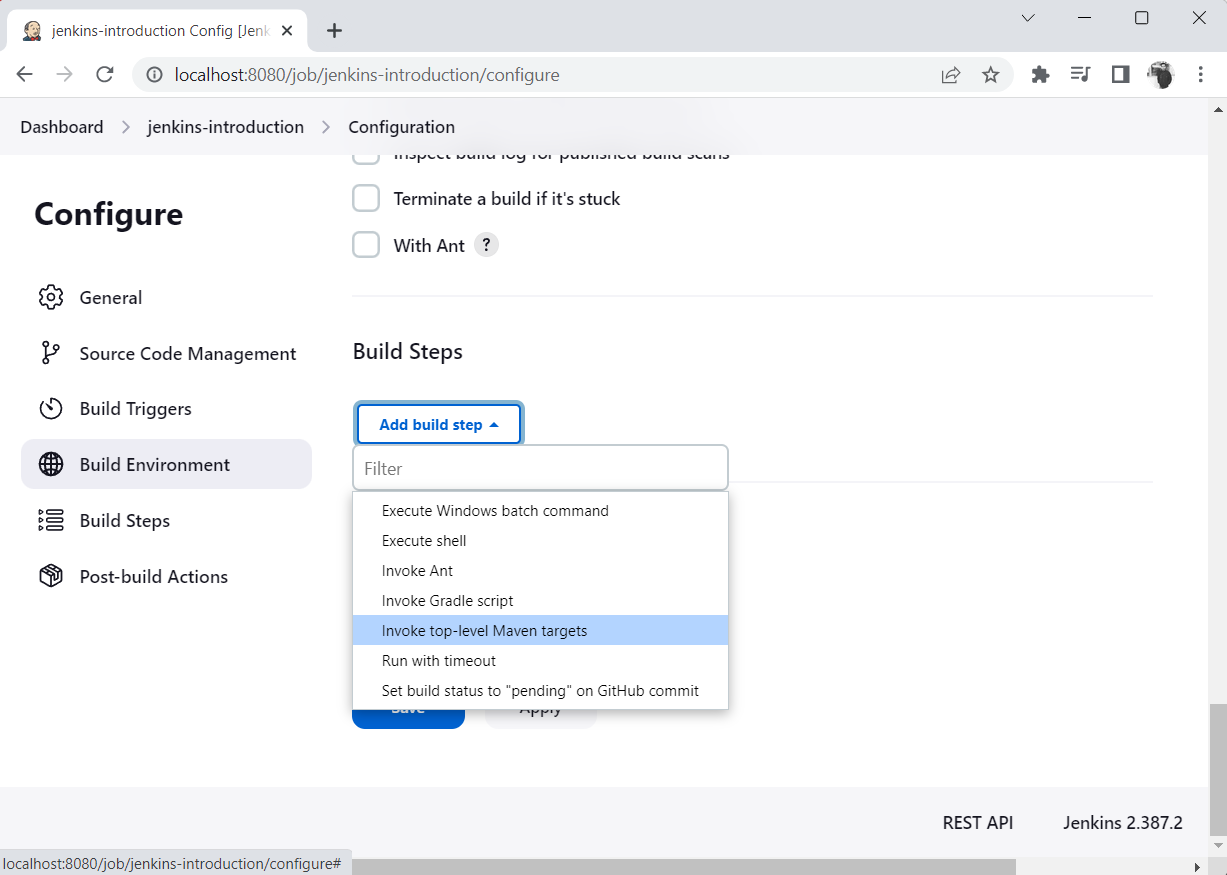
After selecting top-level Maven targets, we set Jenkins goals as install.

3.6 Post-build Actions
Post build actions are those that we want to be executed after our build is completed. For example, we can set the post build actions as email notification, so that Jenkins send mail after every build completes.

We need to provide an email address so Jenkins can send the build status information after the build is completed.

After all the configurations are added, we need to click on Apply, which will apply the above configurations to our project.
Step 4- Jenkins Build
Once we have added all the configuration required for Jenkins, we need to click on Dashboard > Click on our project (here, Jenkins Introduction). As we click on our project, we can see our build is started.

We can click on the down arrow option beside the build number and click on Console Output to see the build logs.

Once we click on Console Output, we can see our application’s build logs.

After the build is finished, we get the corresponding build message: success or failure.

Step 5- Jenkins Continuous Integration: BUILD SUCCESS
In the above step, we can see that all of our CI processes, such as compiling, building and testing are executed successfully. We will again make a code change in our test file and check for CI. For this, we add one more logger statement in our JenkinsApplicationTests class file.
package com.paulsofts.jenkins;
import static org.junit.jupiter.api.Assertions.assertEquals;
import org.apache.logging.log4j.LogManager;
import org.apache.logging.log4j.Logger;
import org.junit.jupiter.api.Test;
import org.springframework.boot.test.context.SpringBootTest;
@SpringBootTest
class JenkinsApplicationTests {
public static Logger LOGGER = LogManager.getLogger(JenkinsApplicationTests.class);
@Test
void contextLoads() {
LOGGER.info("Jenkins executing Test Cases");
//adding one more log statement for testing Jenkins CI process
LOGGER.info("Executing Jenkins Test Cases - for testing continuous integration");
assertEquals(true, true);
}
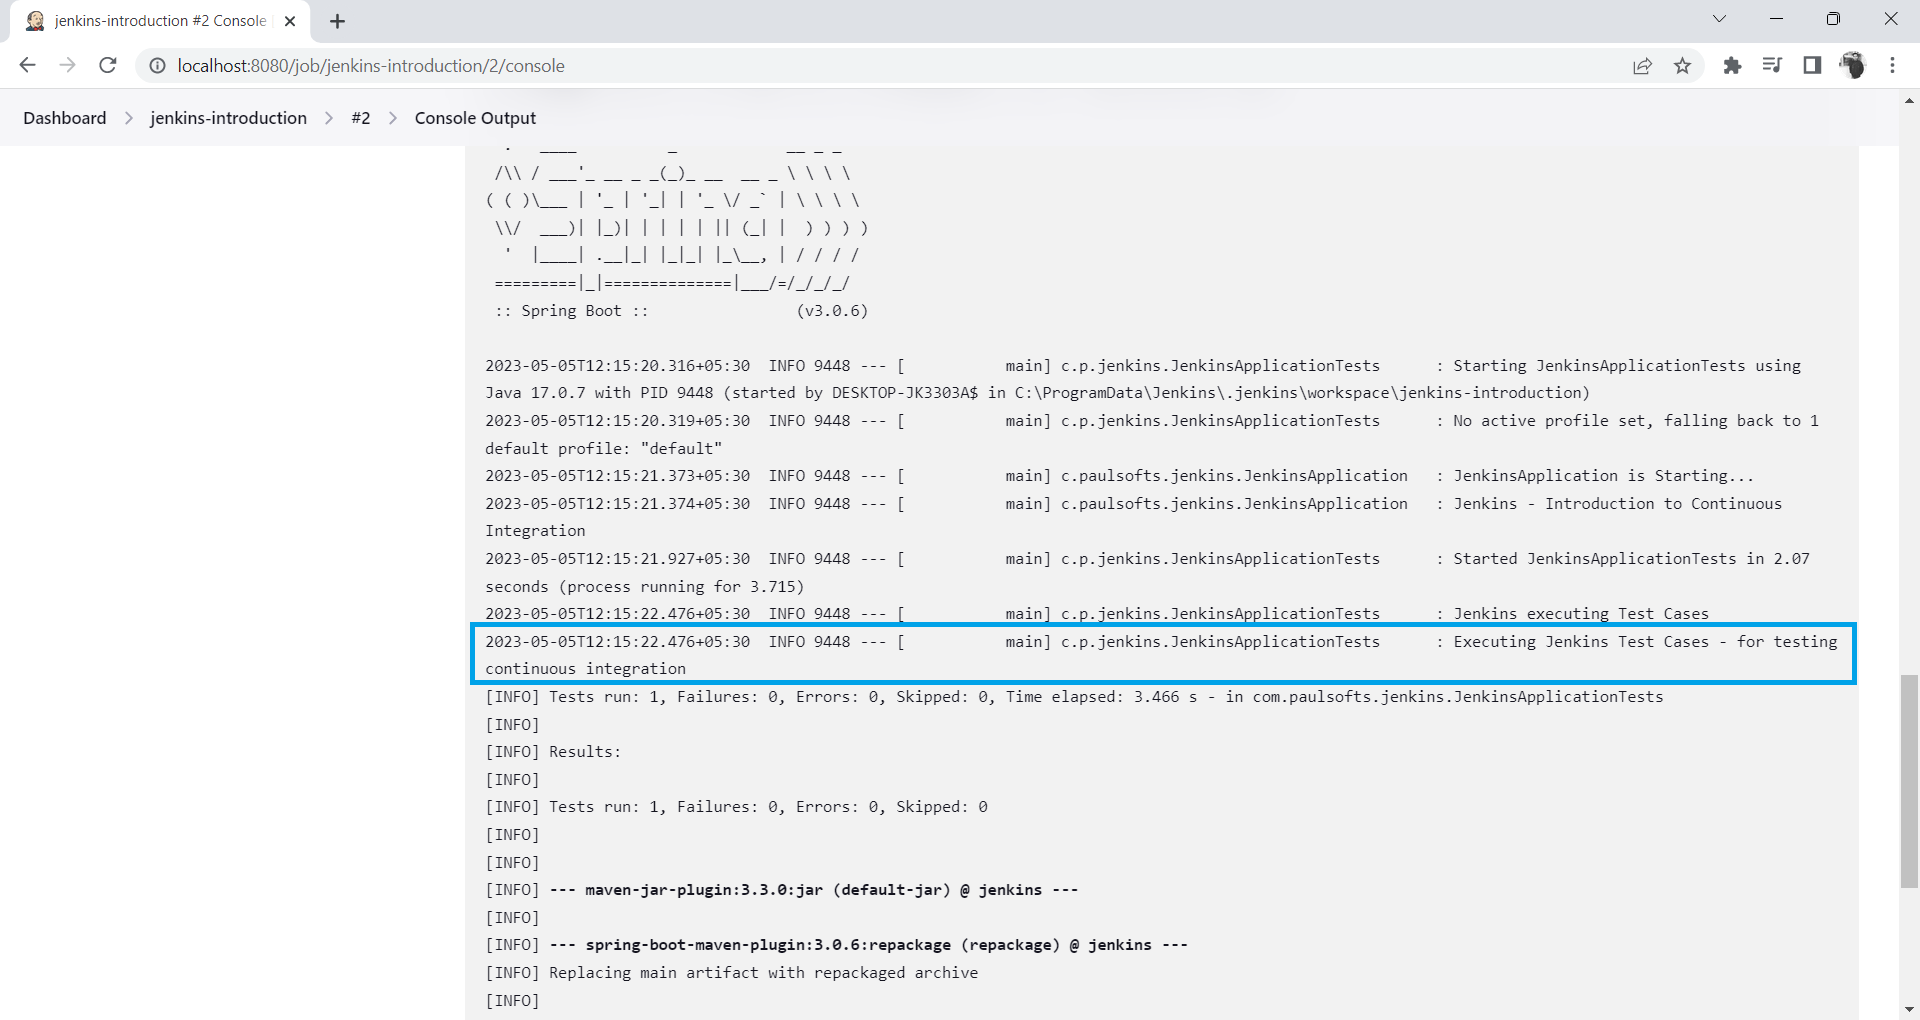
}Now, we push the code changes to our source code repository (GitHub).

As soon as we push our code to GitHub, Jenkins gets started.
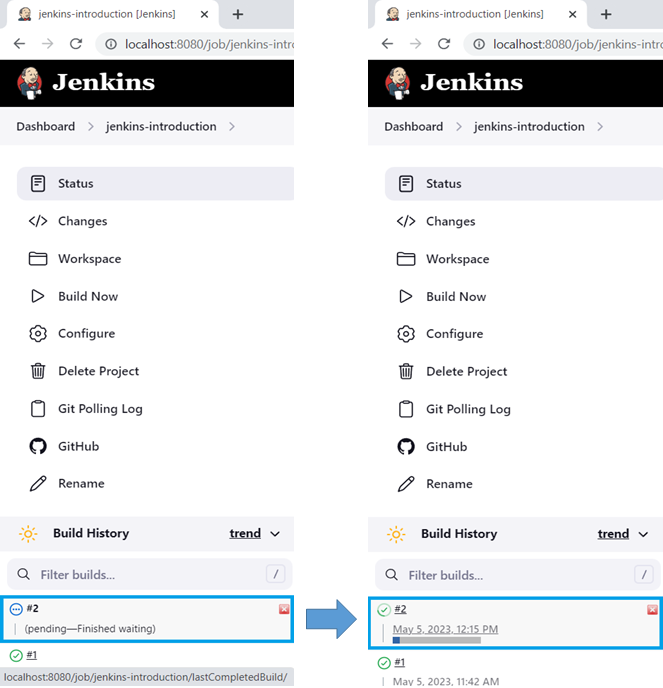
Our build gets successfully completed, and the second logger statement gets executed.
Step 5- Jenkins Continuous Integration: BUILD FAILURE
As we can see above, our Jenkins continuous integration is working. Now, we will add one more failing test case for checking whether our build is failing or not. For this, we will add the following code snippet to our JenkinsApplicationTests file:
package com.paulsofts.jenkins;

import static org.junit.jupiter.api.Assertions.assertEquals;

import org.apache.logging.log4j.LogManager;
import org.apache.logging.log4j.Logger;
import org.junit.jupiter.api.Test;
import org.springframework.boot.test.context.SpringBootTest;

@SpringBootTest
class JenkinsApplicationTests {

	public static Logger LOGGER = LogManager.getLogger(JenkinsApplicationTests.class);

	@Test
	void contextLoads() {
		LOGGER.info("Jenkins executing Test Cases");
		//adding one more log statement for testing Jenkins CI process
		LOGGER.info("Executing Jenkins Test Cases - for testing continuous integration");
		assertEquals(true, true);
	}

	@Test
	void failJenkinsBuild() {
		//executing test case to fail for testing Jenkins CI process
		LOGGER.info("Failing Jenkins Build...");
		assertEquals(true, false);
	}

}
After we push the above code to GitHub, Jenkins will automatically start the CI process for compiling, building and testing. As it completes the CI, we can see the console logs for failure checks.
