Jenkins is an open-source DevOps tool used for continuous integration and deployment via automation of the build, test, and deployment processes across different environments (DEV, SIT, UAT and PROD). Jenkins comes with a built-in feature to get notified once our CI/CD build gets completed. For this, we need to configure email notification in Jenkins server.
Steps to configure email notification in Jenkins
In order to configure email notification in Jenkins we first need to integrate Jenkins with GitHub. To learn more please refer Jenkins – How to integrate Jenkins with GitHub.
Step 1- Configurations
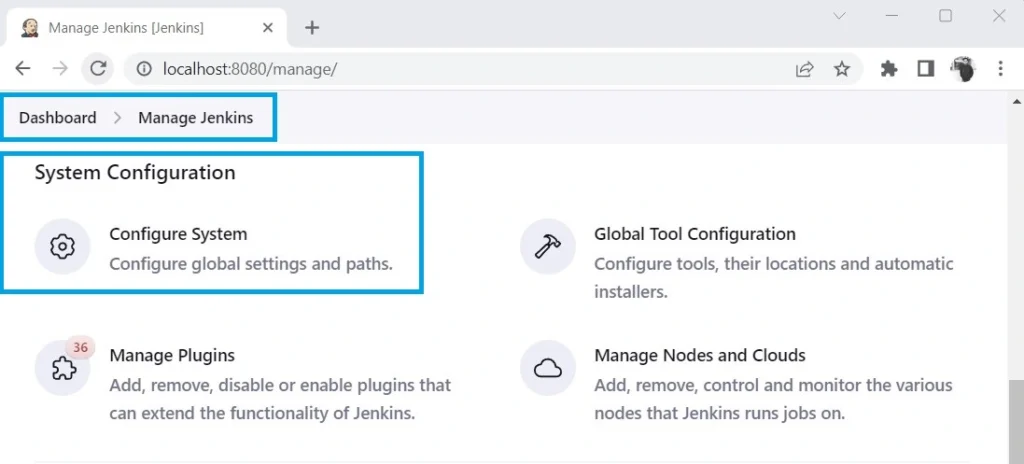
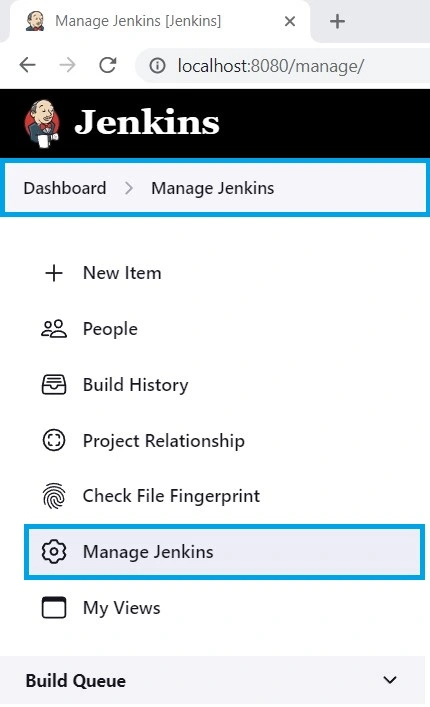
First, we need to configure the email to receive the build notifications. For this, log in to Jenkins > Dashboard > Manage Jenkins > Configure System.
After we click on Manage Jenkins, a new window will appear where we are required to click on Configure System.
On clicking Configure System, we need to scroll down to the bottom for the “Email Notification Section“, and we need to add the following email configurations:
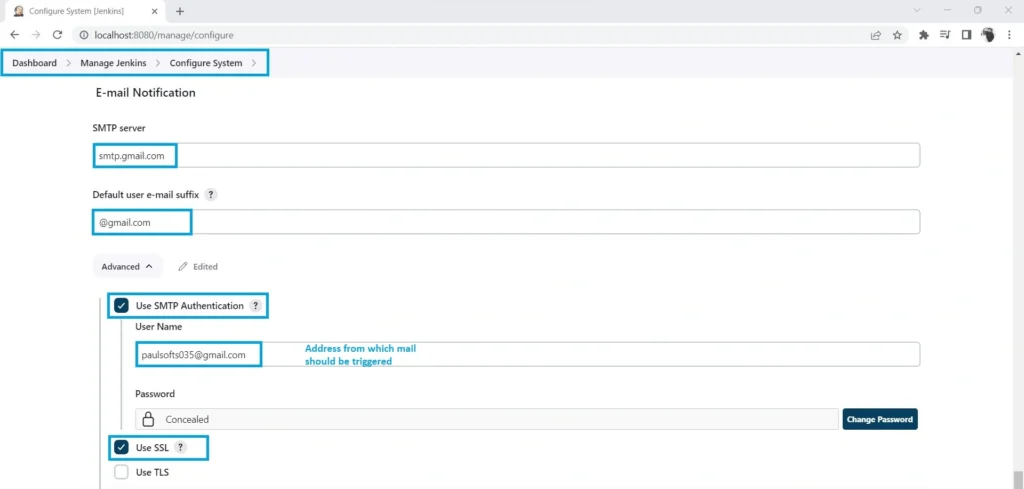
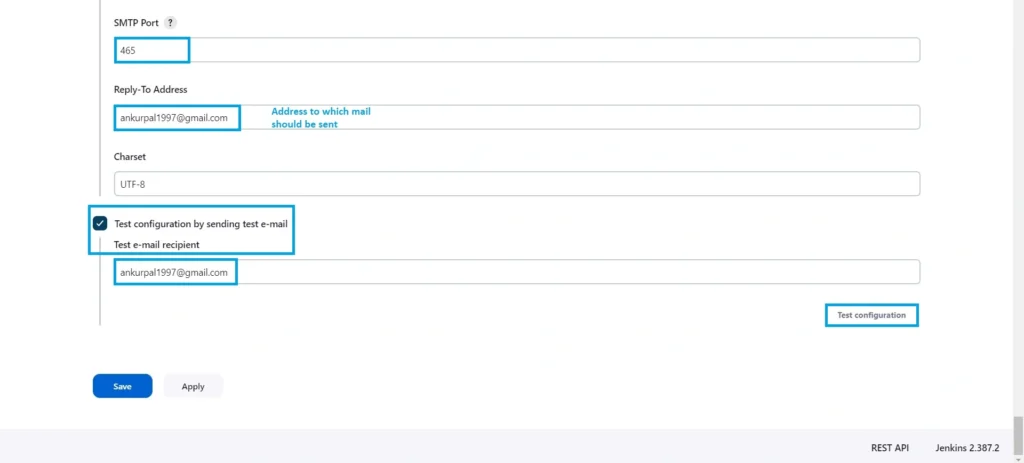
In the above configurations, we have an email-password field from which we need to trigger the emails. If we directly enter the password of the e-mail address that we are using to trigger the mail, we will get an error: saying Application-specific password required. We can test it by adding the test configuration email address and clicking on Test configuration.

Step 2- Generate Application-Specific Password
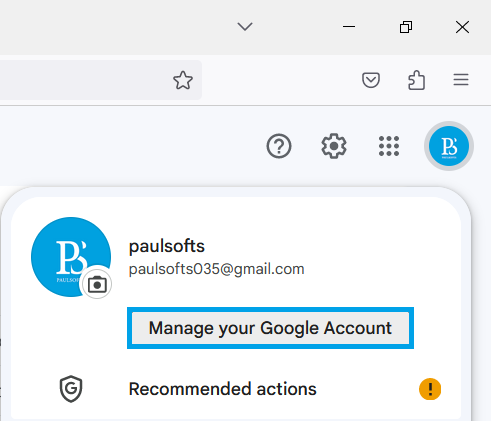
In order to resolve the above issue, we need to generate the application-specific password through google. Make sure that we have our 2-Step Verification done for our google account. First, we need to Login to our Gmail account > Manage your Google Account.
Once we click on Manage your Google Account, it opens our Google Account dashboard, where we need to go to Security > 2-Step Verification.

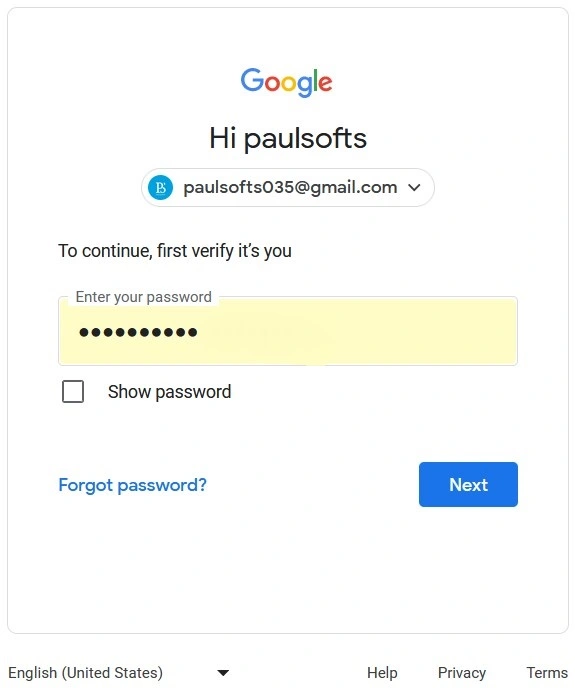
On clicking 2-Step Verification, Google will ask for your e-mail password to login to your Google account.
After we login, we will move to the 2-Step Verification page, where we need to scroll down and choose App Password.
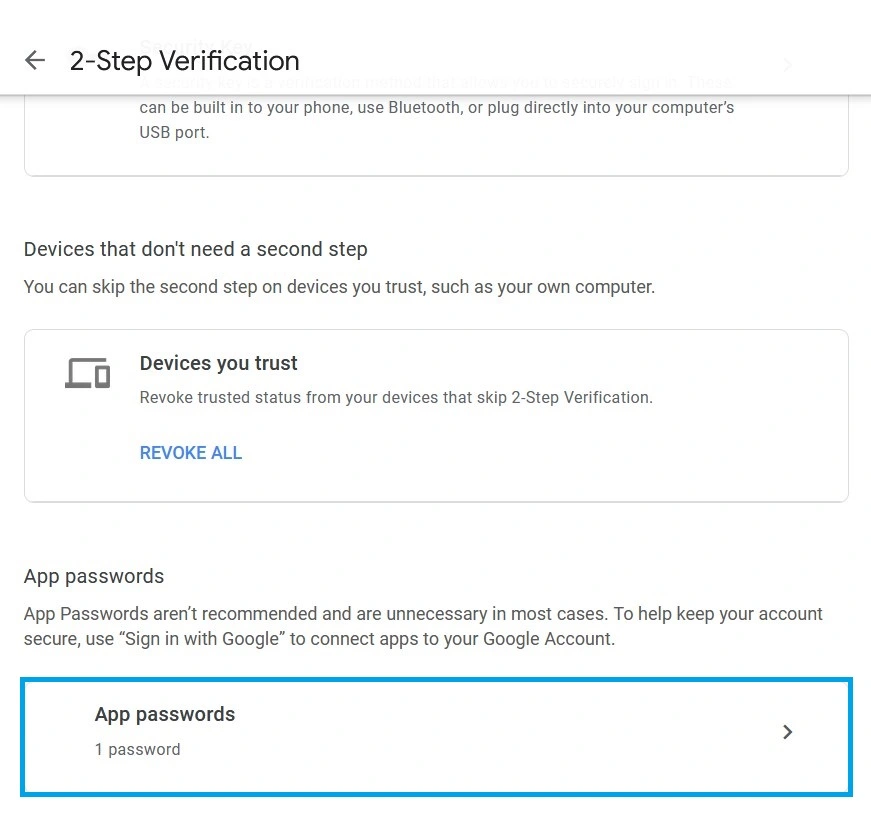
This will open a new window asking to setup the password for the app. Here, we need to select Others (custom name) from the drop-down menu.
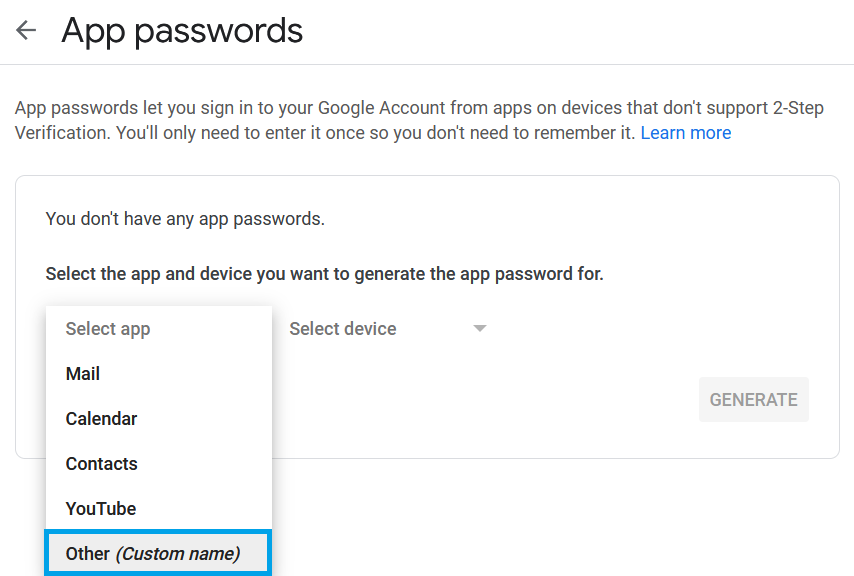
We need to provide a custom name for the app for which we are generating the password. Here, we are using Jenkins as the name of the app, and after that, we need to click on Generate.
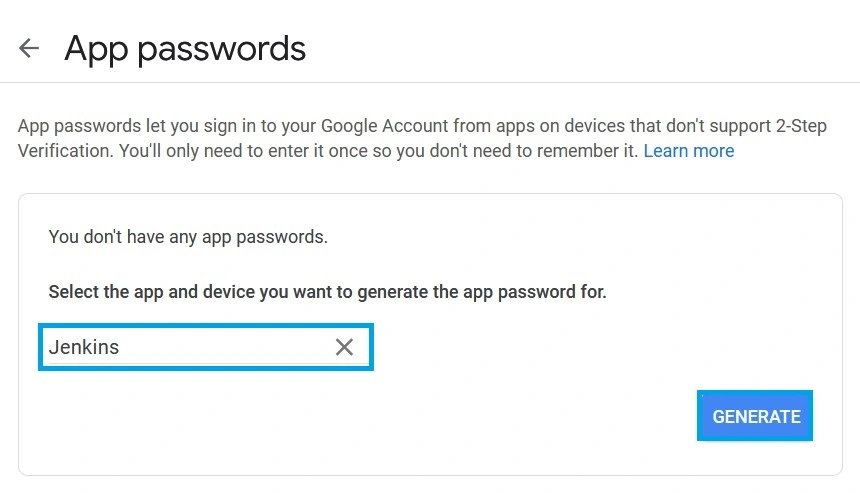
This will generate a 16-digit password for our custom application.
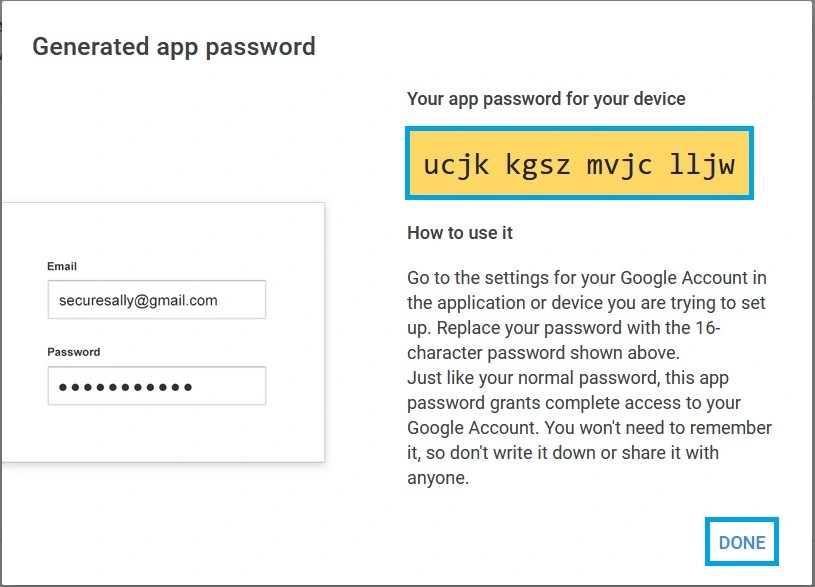
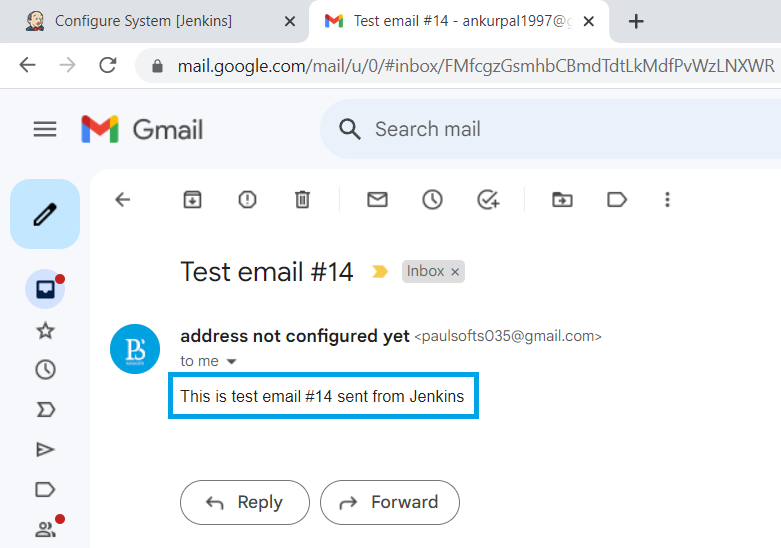
We need to use this 16-digit password in the password field in Step 1 while System Configure. After adding this password, we can click on “Test Configuration to test whether our email is configured successfully. We can see a test email was received at the configured email.
Step 3- Output
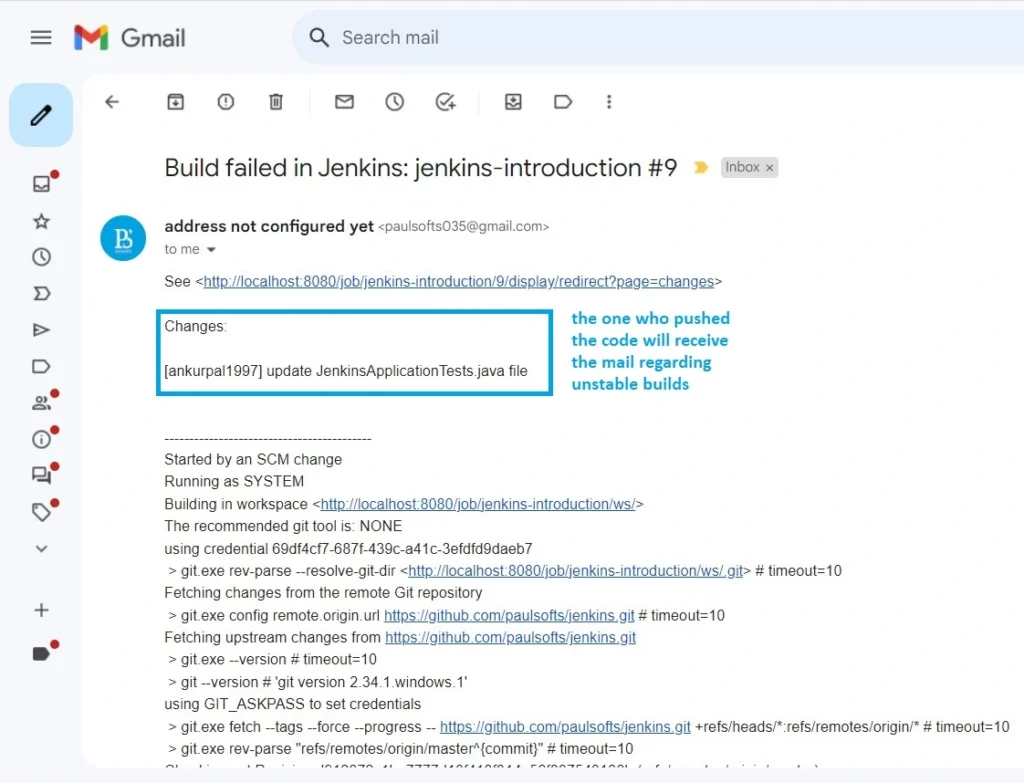
In this step, we will push code to our source repository server, to which we have integrated our Jenkins server, and will push a failed build code to check whether we are receiving mail for unstable builds.
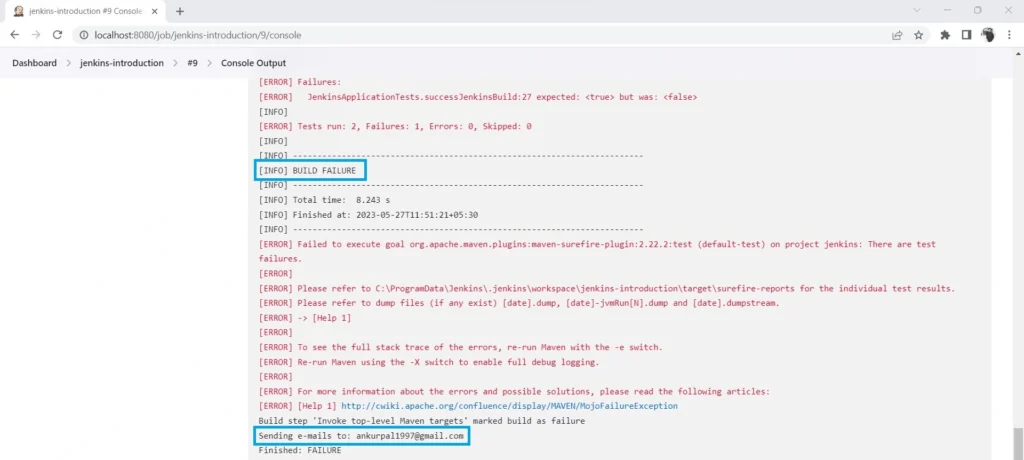
In the above picture, we can see Jenkins is sending email to the configured email ID.Now, we can also check that we have received the mail from Jenkins.
hi