Spring Tool Suite (STS) is an integrated development environment (IDE) designed to facilitate the development of enterprise Java applications using the Spring framework. STS provides tools and features that streamline the development process, making it easier for developers to create, debug, and deploy Spring-based applications. In this tutorial, we will learn how we can add STS plugin in Eclipse.
Following are the features provided by Spring Tool Suite:
- Code assistance
- Project templates
- Integrated Spring tools
- Deployment tools
- Built-in server integration
Steps to install STS plugin in Eclipse
Step 1: Download STS plugin in Eclipse
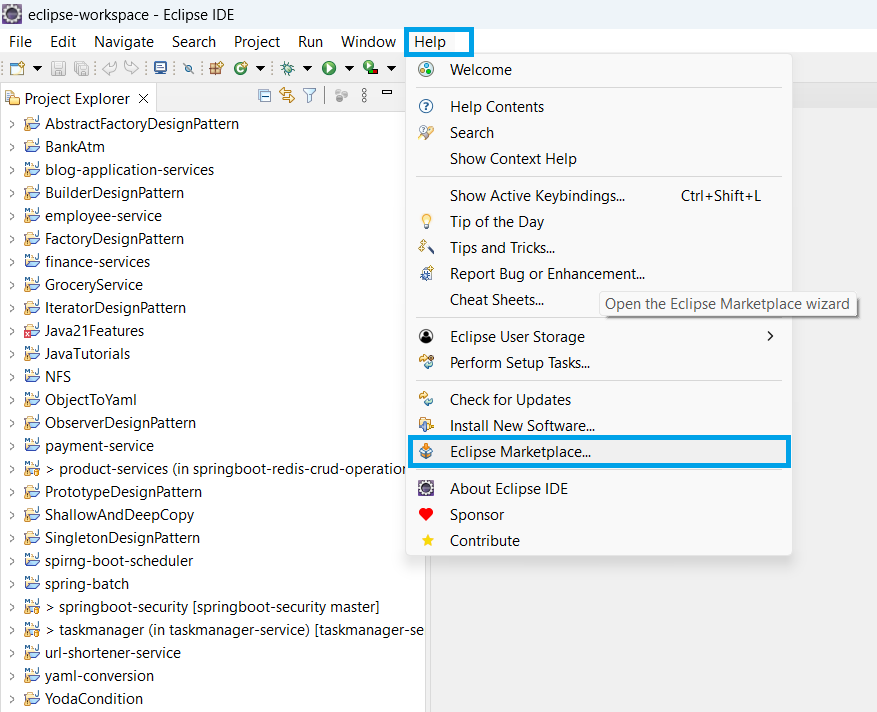
In order to add STS plugin to Eclipse, we need to Open Eclipse > Help > Eclipse Marketplace.
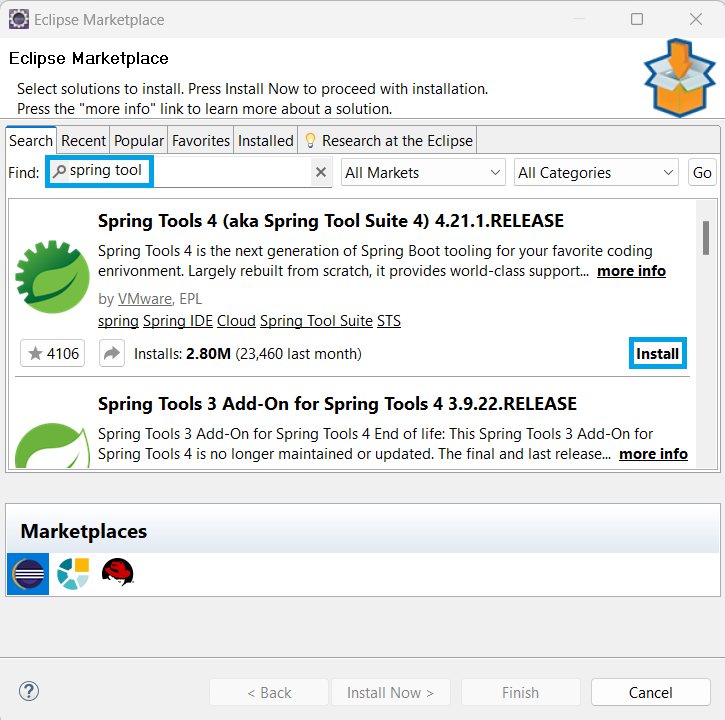
After we click on Eclipse Marketplace, it will open a popup window where we need to search for Spring Tool Suite.
After that, we need to install the Spring Tool Suite and for that we will click on the Install option.
Step 2- Spring Tool Suite features
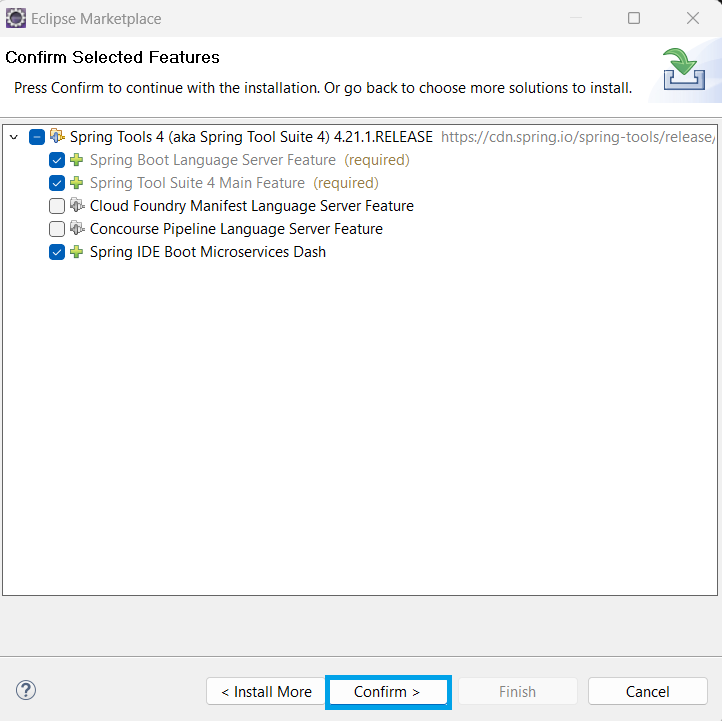
Once we click on Install, it will ask for the required Spring Tool Suite features and once selected, we need to confirm it.
Step 3- Licenses and Trust Authorities
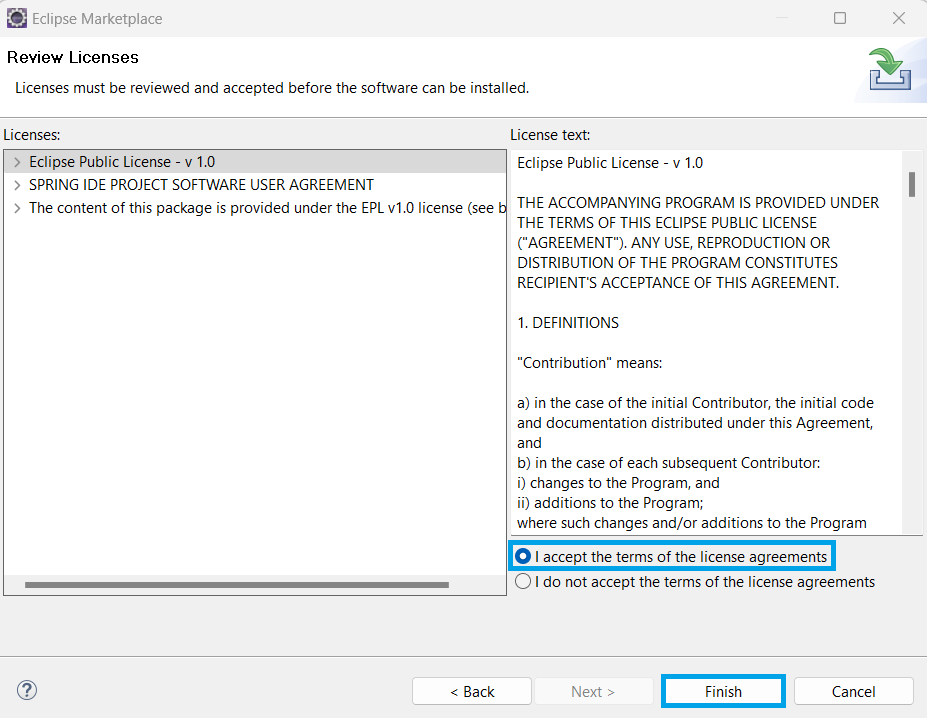
As we confirm the Spring Tool Suite features, we need to review licenses and provide trust to the authorities in order to install the STS plugin over the Eclipse IDE.
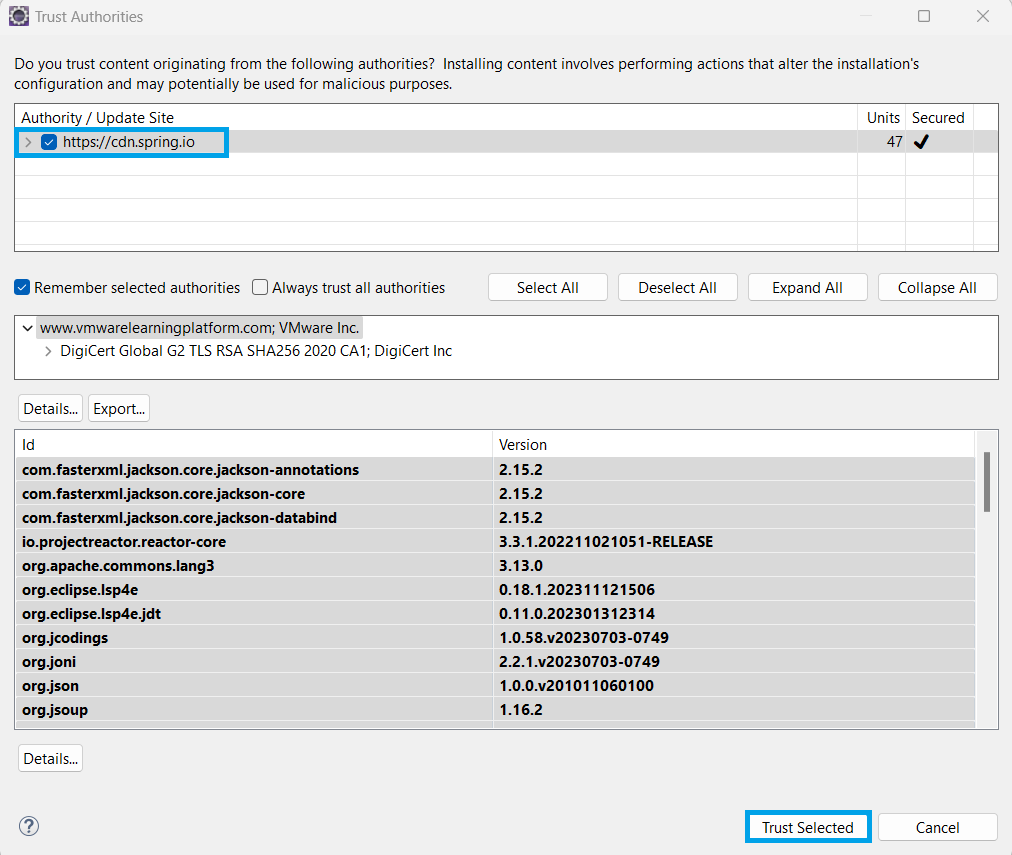
As we accept the license agreements and click on Finish, it will ask for Trust Authorities cdn.spring.io
After we click on Trust Selected, Spring Tool Suite will start getting installed and once completed it will ask for a Reboot of Eclipse.
Step 4- Spring Tool Suite
Once we reboot our Eclipse IDE, we can see a new Boot Dashboard icon added to the toolbar.
Now, we can create a new Spring Boot project using File > New > Project > Spring Starter Project.
