How to store images in database
You can store the images or file in database using the following approaches:
- Store images in database
- Store images in File System
Store images in database
In this approach, you can directly store the images as a binary file in the database, where while storing the image you can compress it and while retrieving it you can decompress it.
Store image in File System
In this approach, you can directly store the image in the file system, and in the database, you will need to store the path of that file or image.
Interview Question:
When you should use a database or file system to store images?
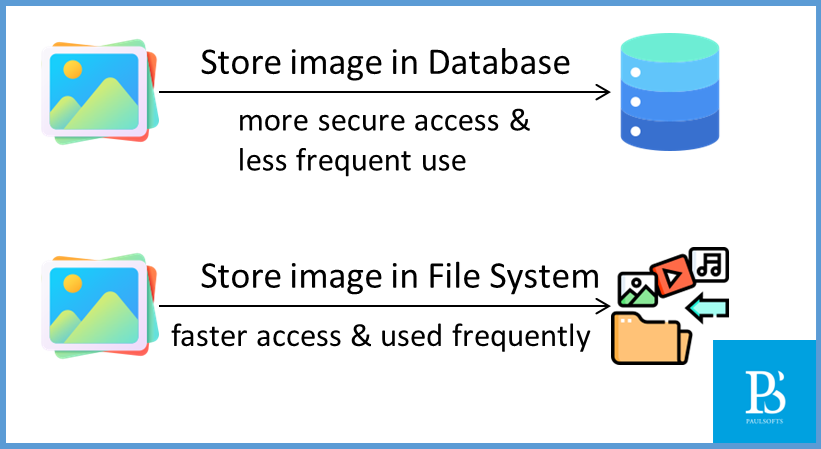
When you have the requirement of securely storing the files or images and they are used less frequently, you should use a database to store images because getting an image from the database involves a lot of steps and will have some sort of delay in response time. However, if you have the requirement of faster access, you should use the file system to store images, as it is a straight-forward process to pull out the image from the file system.
Spring Boot Upload File
Steps to upload image using Spring Boot
Step 1: Create Spring Boot project
First of all, you are required to create a Spring Boot; please refer to How to Create a Spring Boot Project.
Step 2: Create entity class
After we have created our Spring Boot project and imported in IDE, we need to create an entity class for storing our file or image to the database. We will be creating the following entity class to our project.
import jakarta.persistence.Entity;
import jakarta.persistence.GeneratedValue;
import jakarta.persistence.GenerationType;
import jakarta.persistence.Id;
import jakarta.persistence.Lob;
import jakarta.persistence.Table;
import lombok.AllArgsConstructor;
import lombok.Builder;
import lombok.Data;
import lombok.NoArgsConstructor;

/**
 *
 * @author ankur.pal
 */

@Entity
@Table(name = "tbl_img")
@Data
@Builder
@AllArgsConstructor
@NoArgsConstructor
public class ImageData {
	@Id
	@GeneratedValue(strategy = GenerationType.IDENTITY)
	private int id;
	private String name;
	private String resource;
	private String type;

	// This array will be used to store binary data and to perform
	// operation on binary data, we need to annotate it with @Lob
	@Lob
	private byte[] image;
}
Step 3: Create repository class
In order to perform persistence operation with the database, we need to create a repository class. We will create an interface and name it as ImageRepository and extend JpaRepository.
import java.util.Optional;
import org.springframework.data.jpa.repository.JpaRepository;
import org.springframework.stereotype.Repository;

@Repository
public interface ImageRepository extends JpaRepository<ImageData, Integer> {

	//This is a custom finder method, we are not required to provide definition to it,
	//SpringDataJpa will provide the implementation for it.
	Optional<ImageData> findByName(String name);

}
Step 4: Create a service class
Below is our service class, where we have our business logic to upload the image to the database and download it from the DB. Before storing it in the database, we will compress the image similarly; while retrieving it, we need to decompress it. This compression and decompression can be done with the help of the custom Utils class method.
/**
 * 1. uploadImage and downloadImage are used to store and download image
 * 2. before storing the image, we compress it and similarly, while fetching
 *    we will decompress
 * 3. This compress and decompress will be done with the help of custom Utils class method
 * @author ankur.pal
 */
@Service
public class ImageService {

	@Autowired
	private ImageRepository repository;

	public String uploadImage(MultipartFile file) throws IOException {
		ImageData image = this.repository.save(ImageData.builder()
				.name(file.getOriginalFilename())
				.resource(file.getName())
				.type(file.getContentType())
				.image(Utils.compress(file.getBytes()))
				.build());
		Optional<ImageData> img = Optional.ofNullable(image);
		if(img.isPresent()) {
			System.out.println(file.getName());
			System.out.println(file.getOriginalFilename());
			return "File uploaded successfully " + file.getOriginalFilename();

		}
		return "Something went wrong!";
	}

	public byte[] downloadImage(String file) {
		Optional<ImageData> img = this.repository.findByName(file);
		byte[] images = Utils.decompress(img.get().getImage());
		return images;
	}

}
Step 5: Utils class to compress and decompress the image
The Utils class has two methods to compress and decompress the image using Deflater.
import java.io.ByteArrayOutputStream;
import java.util.zip.Deflater;
import java.util.zip.Inflater;

public class Utils {

	public static byte[] compress(byte[] data) {
		Deflater deflater = new Deflater();
		deflater.setLevel(Deflater.BEST_COMPRESSION);
		deflater.setInput(data);
		deflater.finish();

		ByteArrayOutputStream outputStream = new ByteArrayOutputStream(data.length);
		byte[] tmp = new byte[4 * 1024];
		while (!deflater.finished()) {
			int size = deflater.deflate(tmp);
			outputStream.write(tmp, 0, size);
		}
		try {
			outputStream.close();
		} catch (Exception ignored) {
		}
		return outputStream.toByteArray();
	}

	public static byte[] decompress(byte[] data) {
		Inflater inflater = new Inflater();
		inflater.setInput(data);
		ByteArrayOutputStream outputStream = new ByteArrayOutputStream(data.length);
		byte[] tmp = new byte[4 * 1024];
		try {
			while (!inflater.finished()) {
				int count = inflater.inflate(tmp);
				outputStream.write(tmp, 0, count);
			}
			outputStream.close();
		} catch (Exception ignored) {
		}
		return outputStream.toByteArray();
	}

}
Step 6: Create controller class
Now, we are required to create our controller class. We will be using the SpringBootApplication class itself as the controller class; we need to annotate it with @RestController annotations and add methods for uploading and downloading the images.
import java.io.IOException;
import org.springframework.beans.factory.annotation.Autowired;
import org.springframework.boot.SpringApplication;
import org.springframework.boot.autoconfigure.SpringBootApplication;
import org.springframework.http.HttpStatus;
import org.springframework.http.MediaType;
import org.springframework.http.ResponseEntity;
import org.springframework.web.bind.annotation.GetMapping;
import org.springframework.web.bind.annotation.PathVariable;
import org.springframework.web.bind.annotation.PostMapping;
import org.springframework.web.bind.annotation.RequestMapping;
import org.springframework.web.bind.annotation.RequestParam;
import org.springframework.web.bind.annotation.RestController;
import org.springframework.web.multipart.MultipartFile;


@SpringBootApplication
@RestController
@RequestMapping("/api/v1")
public class FileStorageSystemApplication {

	@Autowired
	private ImageService service;

	@PostMapping("/upload")
	public ResponseEntity<?> uploadImage(@RequestParam("image") MultipartFile file) throws IOException{
		String response = this.service.uploadImage(file);
		return ResponseEntity.status(HttpStatus.OK)
				.body(response);
	}

	@GetMapping("/download/{name}")
	public ResponseEntity<?> downloadImage(@PathVariable("name") String name) throws IOException{
		byte[] response = this.service.downloadImage(name);
		return ResponseEntity.status(HttpStatus.OK)
				.contentType(MediaType.valueOf("image/png"))
				.body(response);
	}

	public static void main(String[] args) {
		SpringApplication.run(FileStorageSystemApplication.class, args);
	}

}
Step 7: Test application
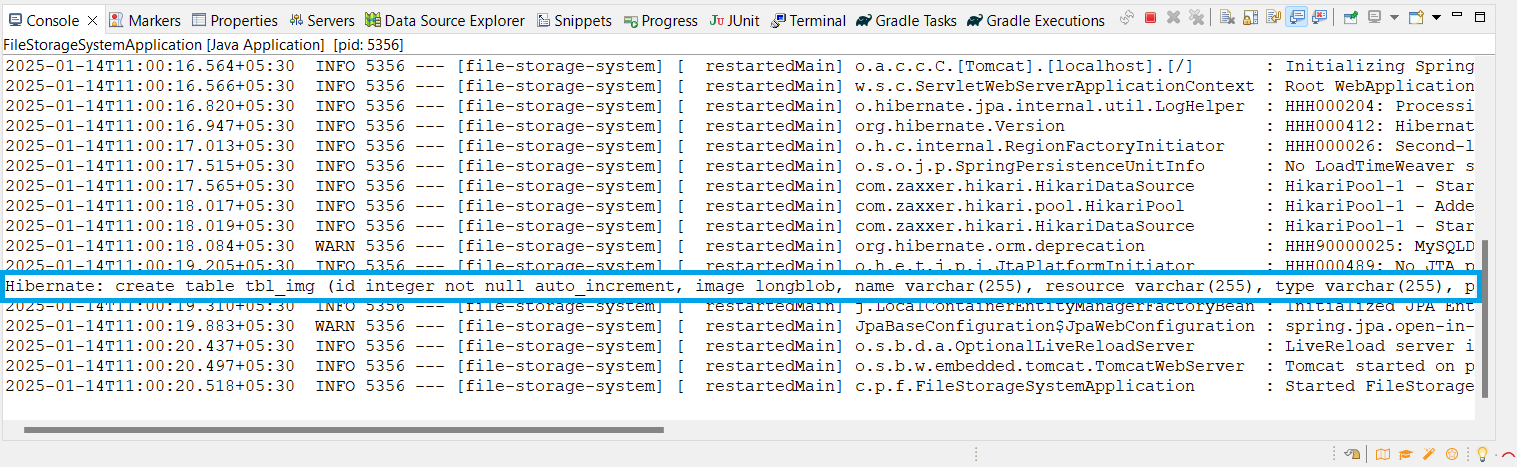
In this step, we will test our application with the help of the Postman API. First, we need to run our application; then Hibernate will create the table in our specified DB.
First of all, we hit our upload API to add an image to the database in BLOB format.

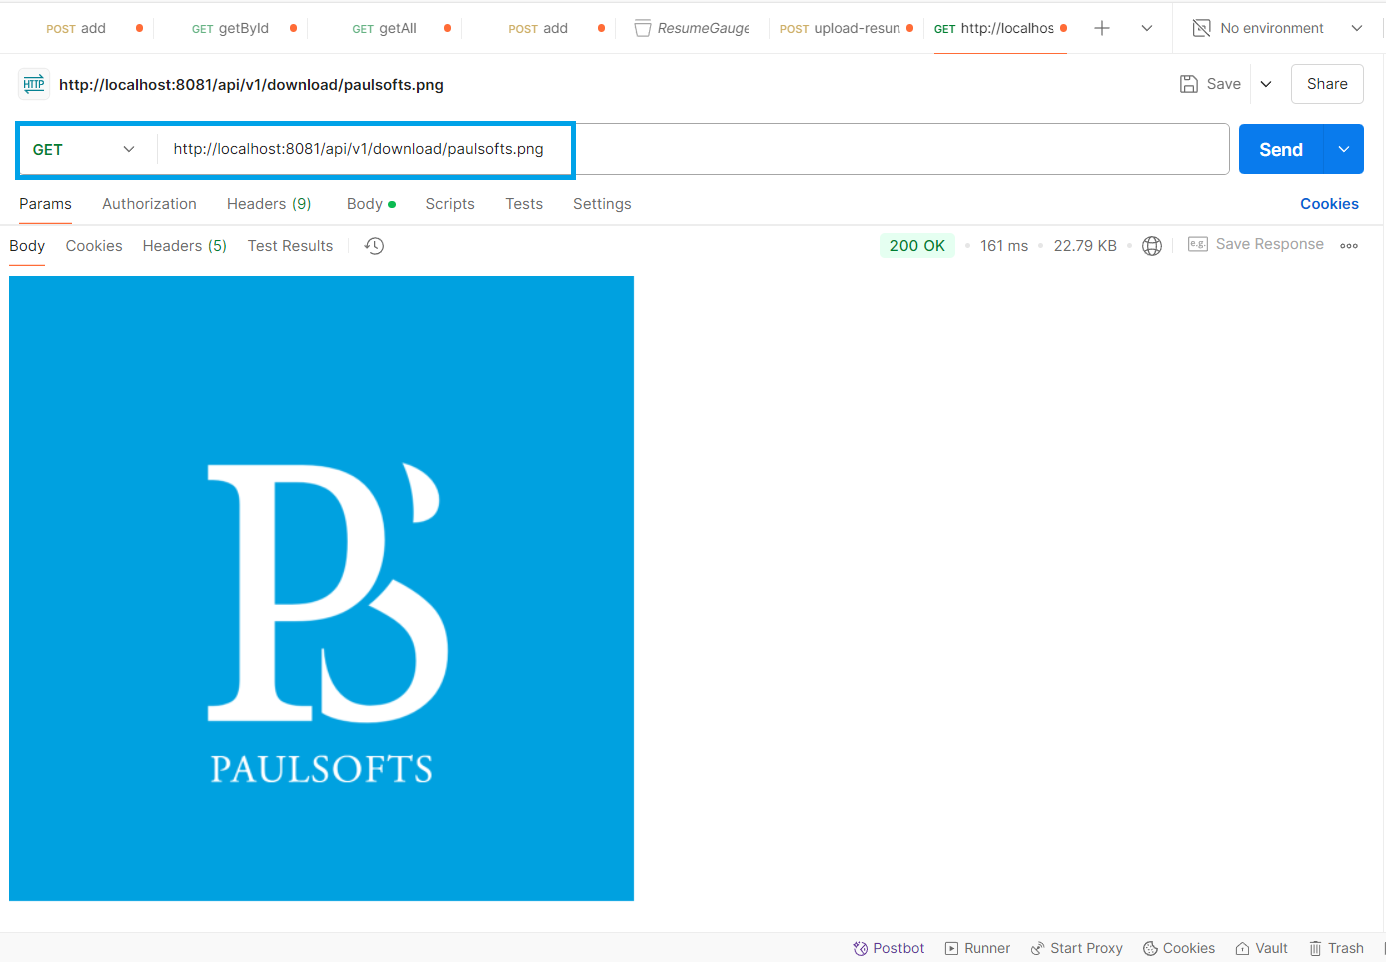
Similarly, we can hit our download API to download the image.