Importing a project in Eclipse means importing it from some other workspace and adding it to the current workspace. i.e., to load a project from a local directory or remote server into the Eclipse workspace. In this tutorial, we learn about how we can import project in Eclipse.
It is very often that we have project source code and we are not aware of which type of project it is, whether it is a Java, Spring, or Spring Boot project, or if the build tool is Maven or Gradle, and we want to open or import project in Eclipse.
Steps to import project in Eclipse
We learn to go step by step and import an existing Java project in Eclipse. One can follow the same steps to import any Java, Maven, or Gradle project into Eclipse.
Step 1- Import Java project in Eclipse
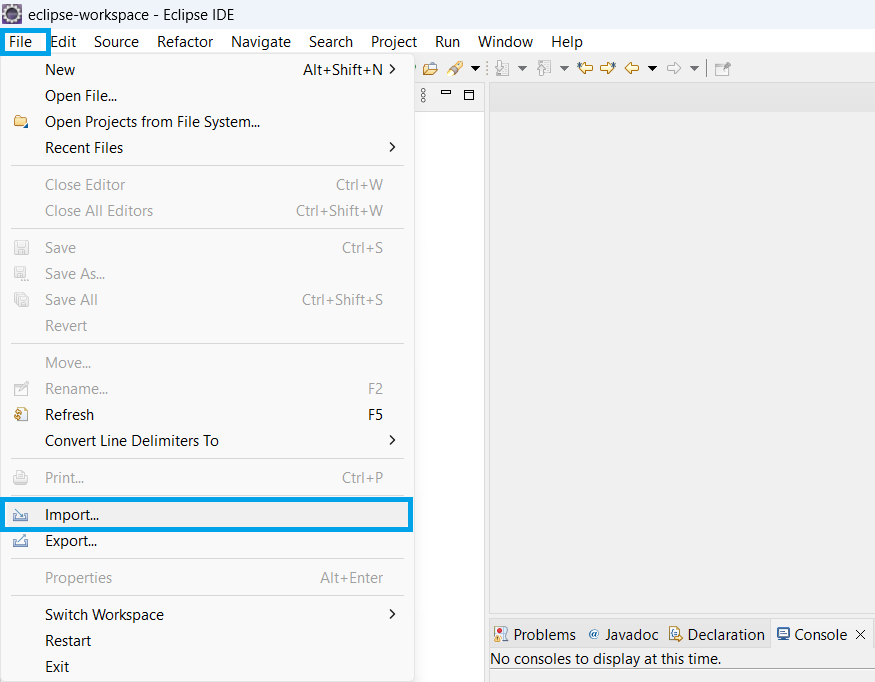
In Eclipse, we do not have the option to Open a project directly; we need to import the project from a local directory or remote server into the Eclipse workspace. For this, go to Eclipse > File > Import.
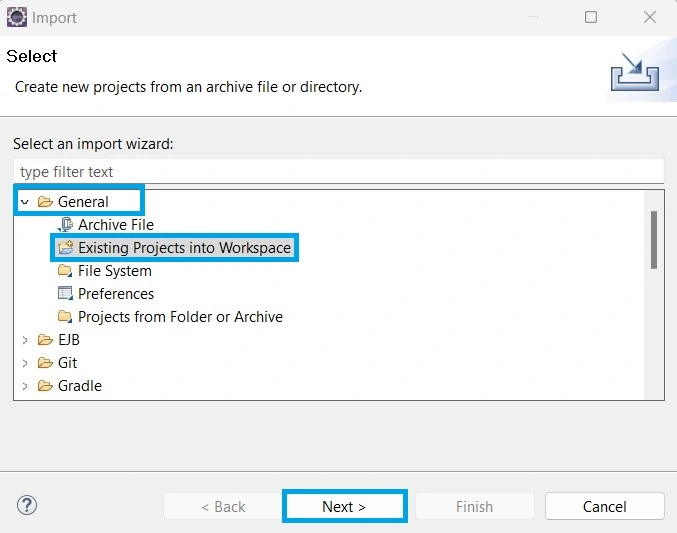
Once we click on import, it will open a popup window where we need to go to General > Existing Projects into Workspace > Next.
Step 2- Project root directory
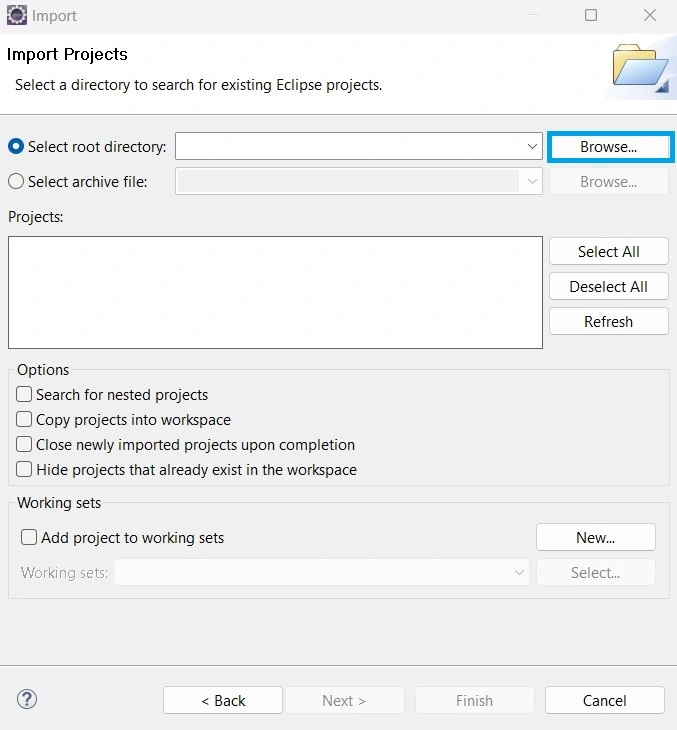
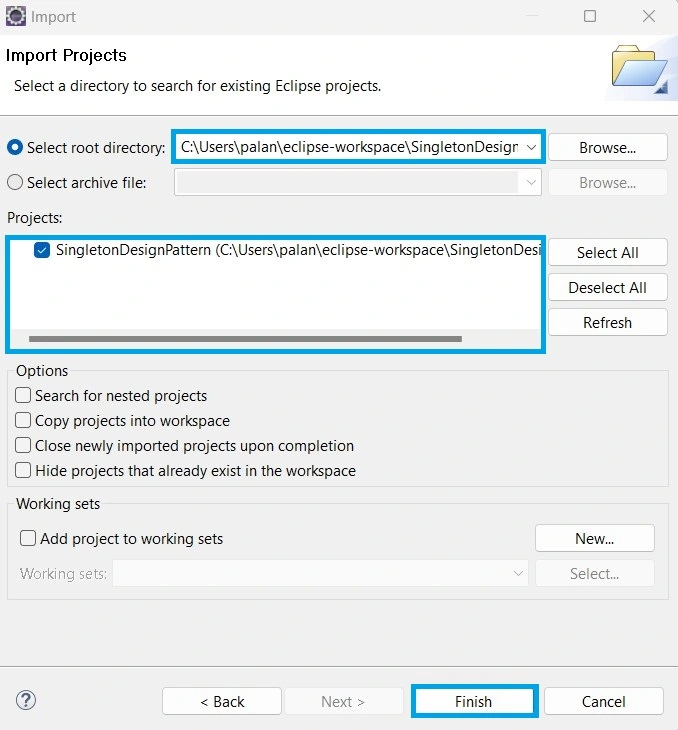
After we click on Next, Eclipse will open an Import Project window where we need to select the root directory of our project.
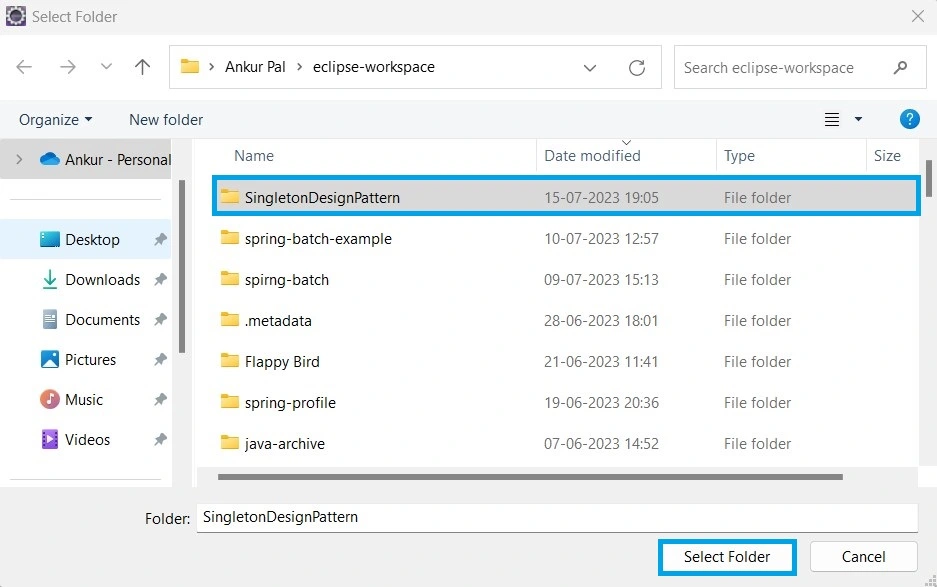
We need to click on Browse, open our project path, and Select the application.
After we Select our project directory, we need to click on Select Folder. This will open the add path to our project’s root directory in Eclipse.
Once our project’s root directory is added to Eclipse, we need to click on Finish. Eclipse will download the required configurations and build the project, and our project is imported to Eclipse.
