MySQL Workbench is an integrated development environment tool for designing and modeling database architecture. It is a unified visual tool for database architects, developers and DBAs(Database Administrators). MySQL Workbench comes along with various integrated tools which can be easily used for administrating purposes of server configurations, executing SQL queries, complex database schema designing and management, backup etc. MySQL Workbench is available for almost all the common operating system such as Windows, Mac OS and Linux.
MySQL Workbench offers the following editions:
- MySQL Workbench Community Edition — Open Source (GPL License)
- MySQL Workbench Standard Edition — Commercial
- MySQL Workbench Enterprise Edition — Commercial
MySQL Workbench features
- DB schema design
- DB development and management
- DB administrator
- DB performance dashboard
- DB migration
- DB reverse engineering
- DB forward engineering
Note: In this tutorial, we will create database schema for our Blog Application. Please refer the Blog Application Series for complete backend development with Spring Boot and MySQL.
Steps to create database schema
Step 1- Create DB Schema
In this step, we will be create database schema for Blog Application for this will be using MySQL Workbench. To create db schema Open Workbench > Schema > Right-Click > Create Schema.

Step 2- Name DB Schema
Once, we click on Create Schema, workbench will open a popup for schema name. We need to write the name of our database(Here, we will be using blog-application-db).

Step 3- Execute SQL Script
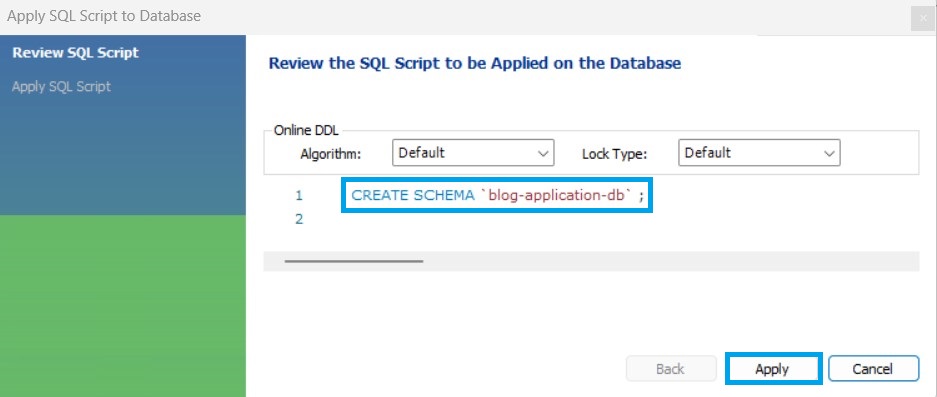
After we have named our db, we need to click on Apply. It will open another popup window asking to apply SQL script to create database.

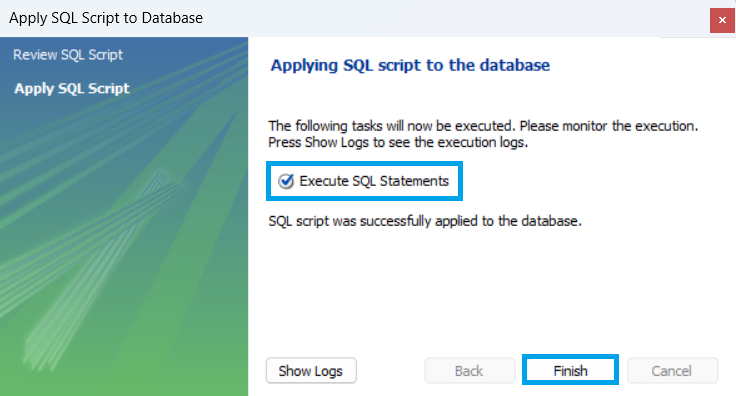
Once, we click on Apply, workbench again popup a confirmation tab to execute SQL scripts.

After we click Finish, workbench will execute the SQL scripts.

Output:
Once, the database scripts gets executed, our database will get created.
